Prerequisites
Before you begin, make sure you have:Cloud provider account
Cloud provider account
An active account with AWS, GCP, or Azure with admin or owner permissions. Porter provisions infrastructure in your cloud account, so you’ll need permissions to create resources like Kubernetes clusters, networking components, and IAM roles.
A deployable application
A deployable application
Your application should:
- Have a start command or Dockerfile
- Be pushed to a GitHub repository (or have a container image in a registry)
Step 1: Sign up and create a project
- Navigate to dashboard.porter.run and create an account
- Click Create Project
- Enter a project name
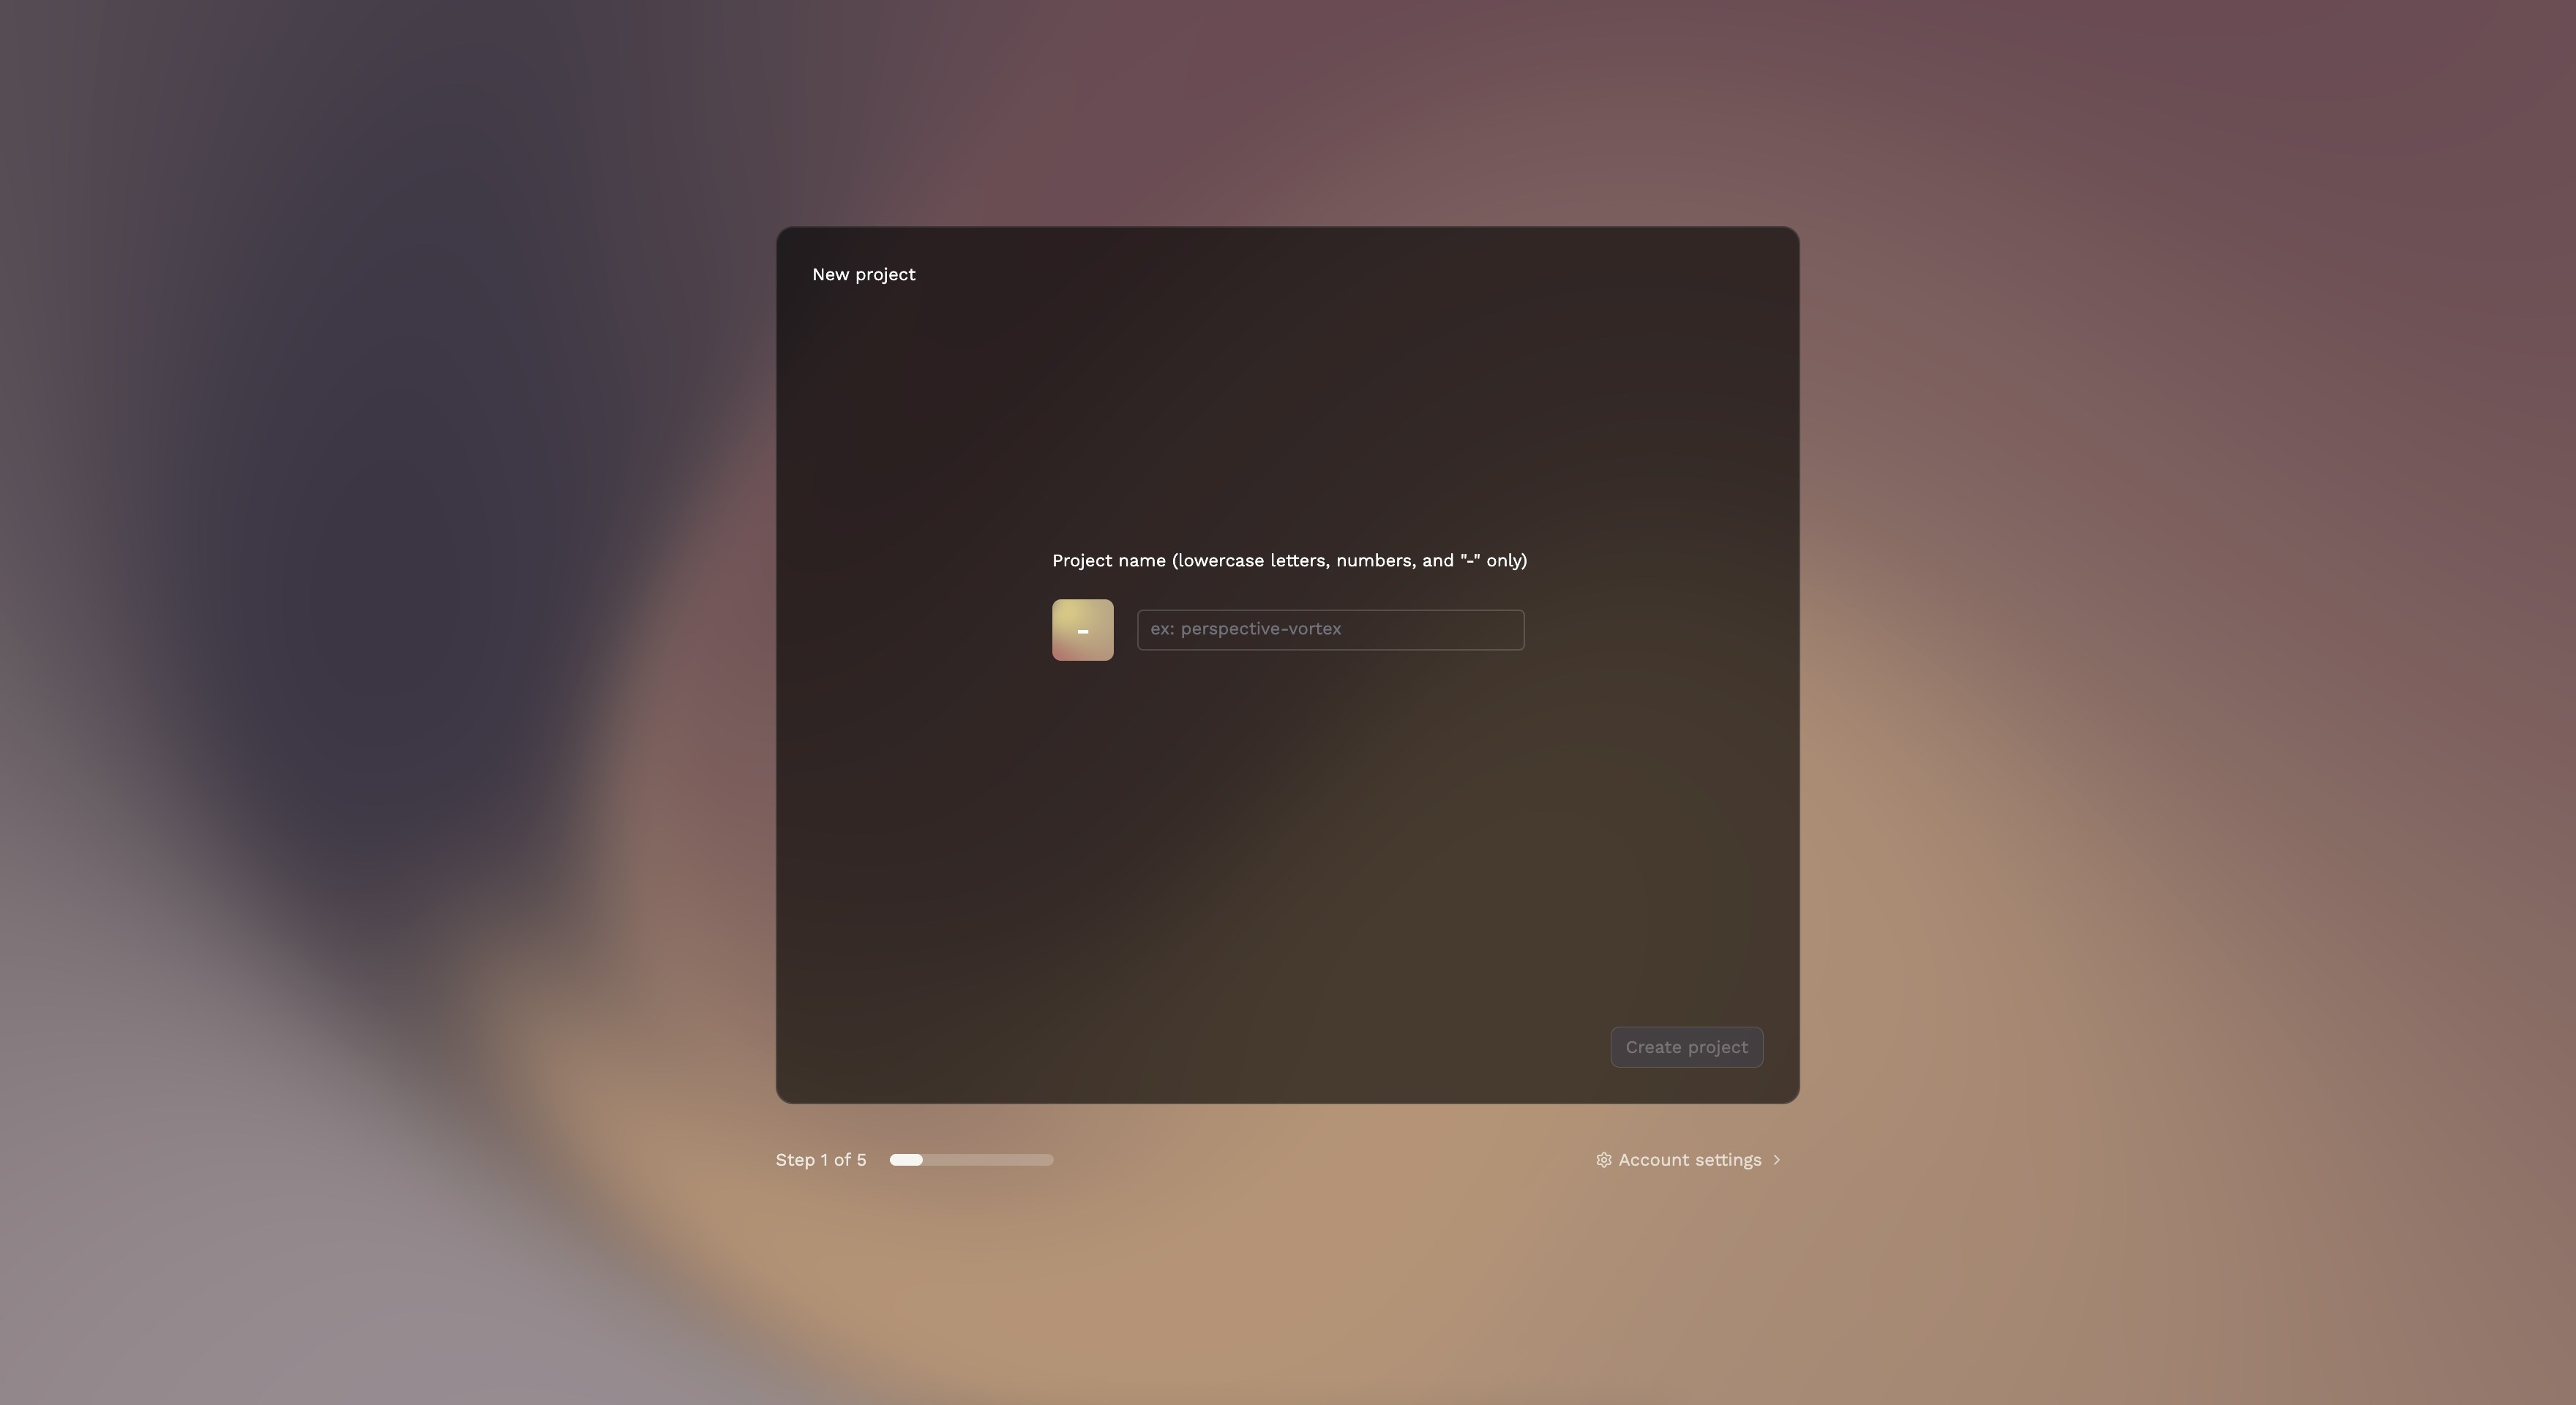
Project names must be 1-25 characters, using only lowercase letters, numbers, and hyphens.
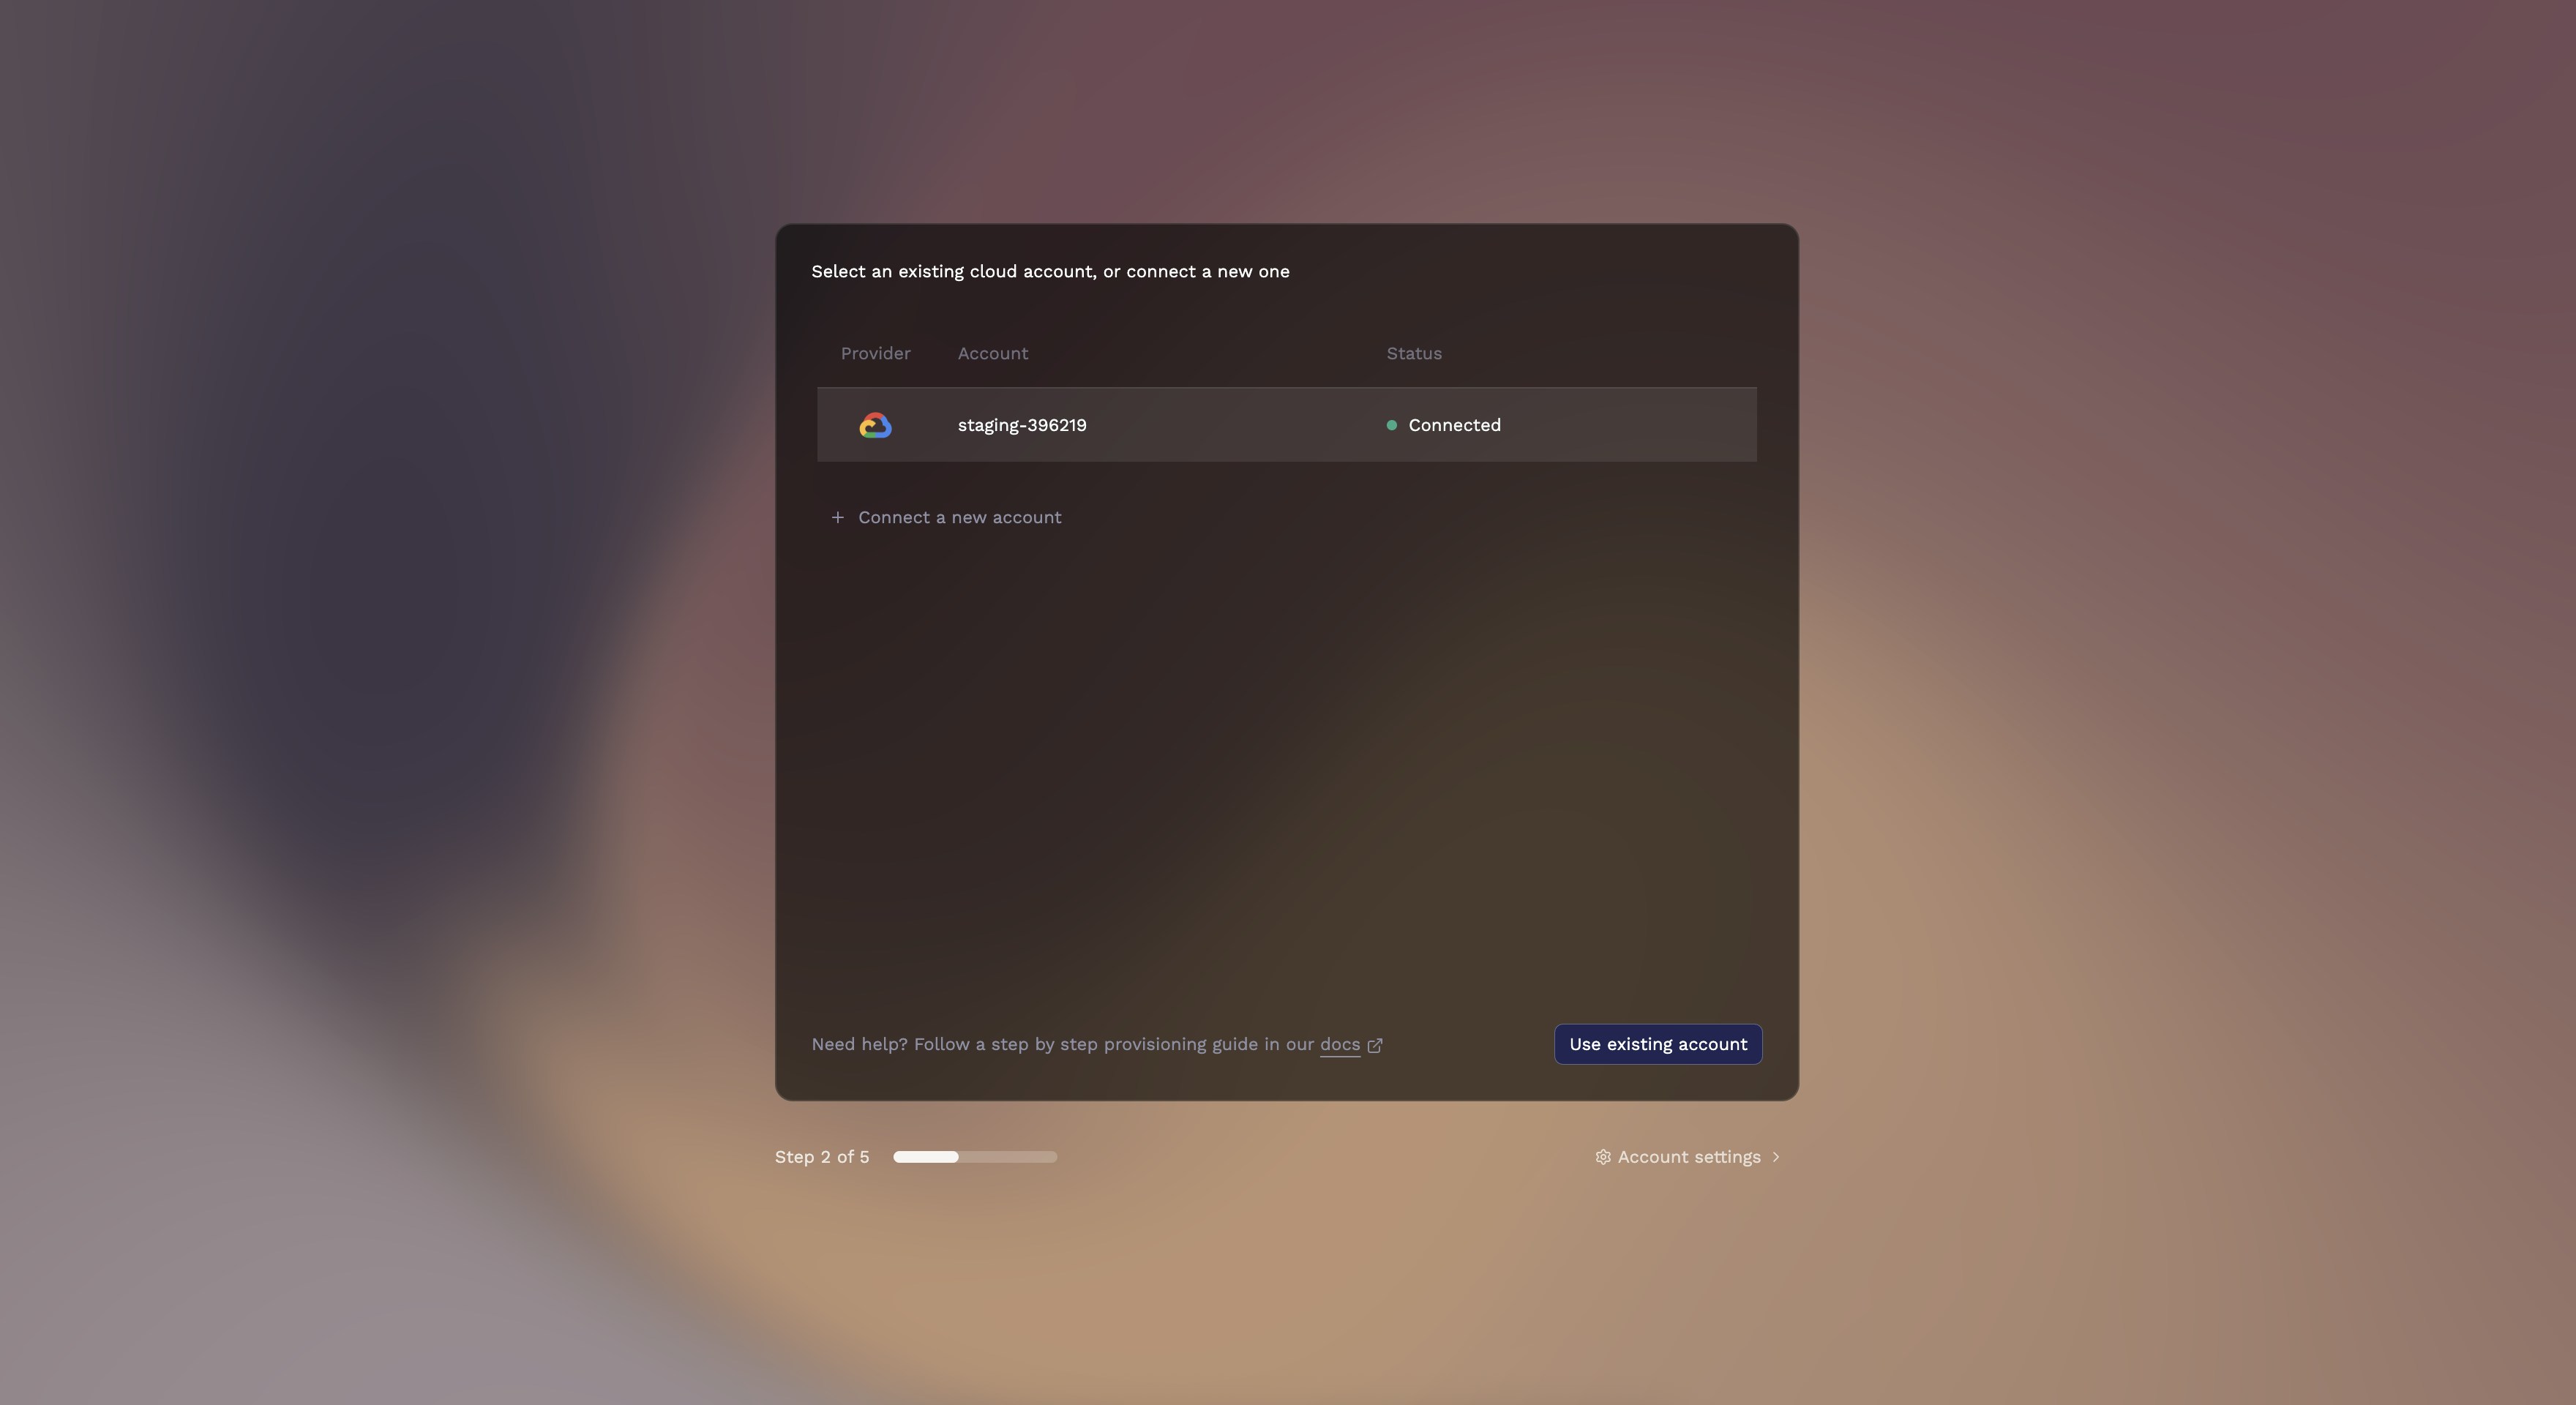
Step 2: Select your cloud provider
Choose the cloud provider where you want Porter to provision your infrastructure.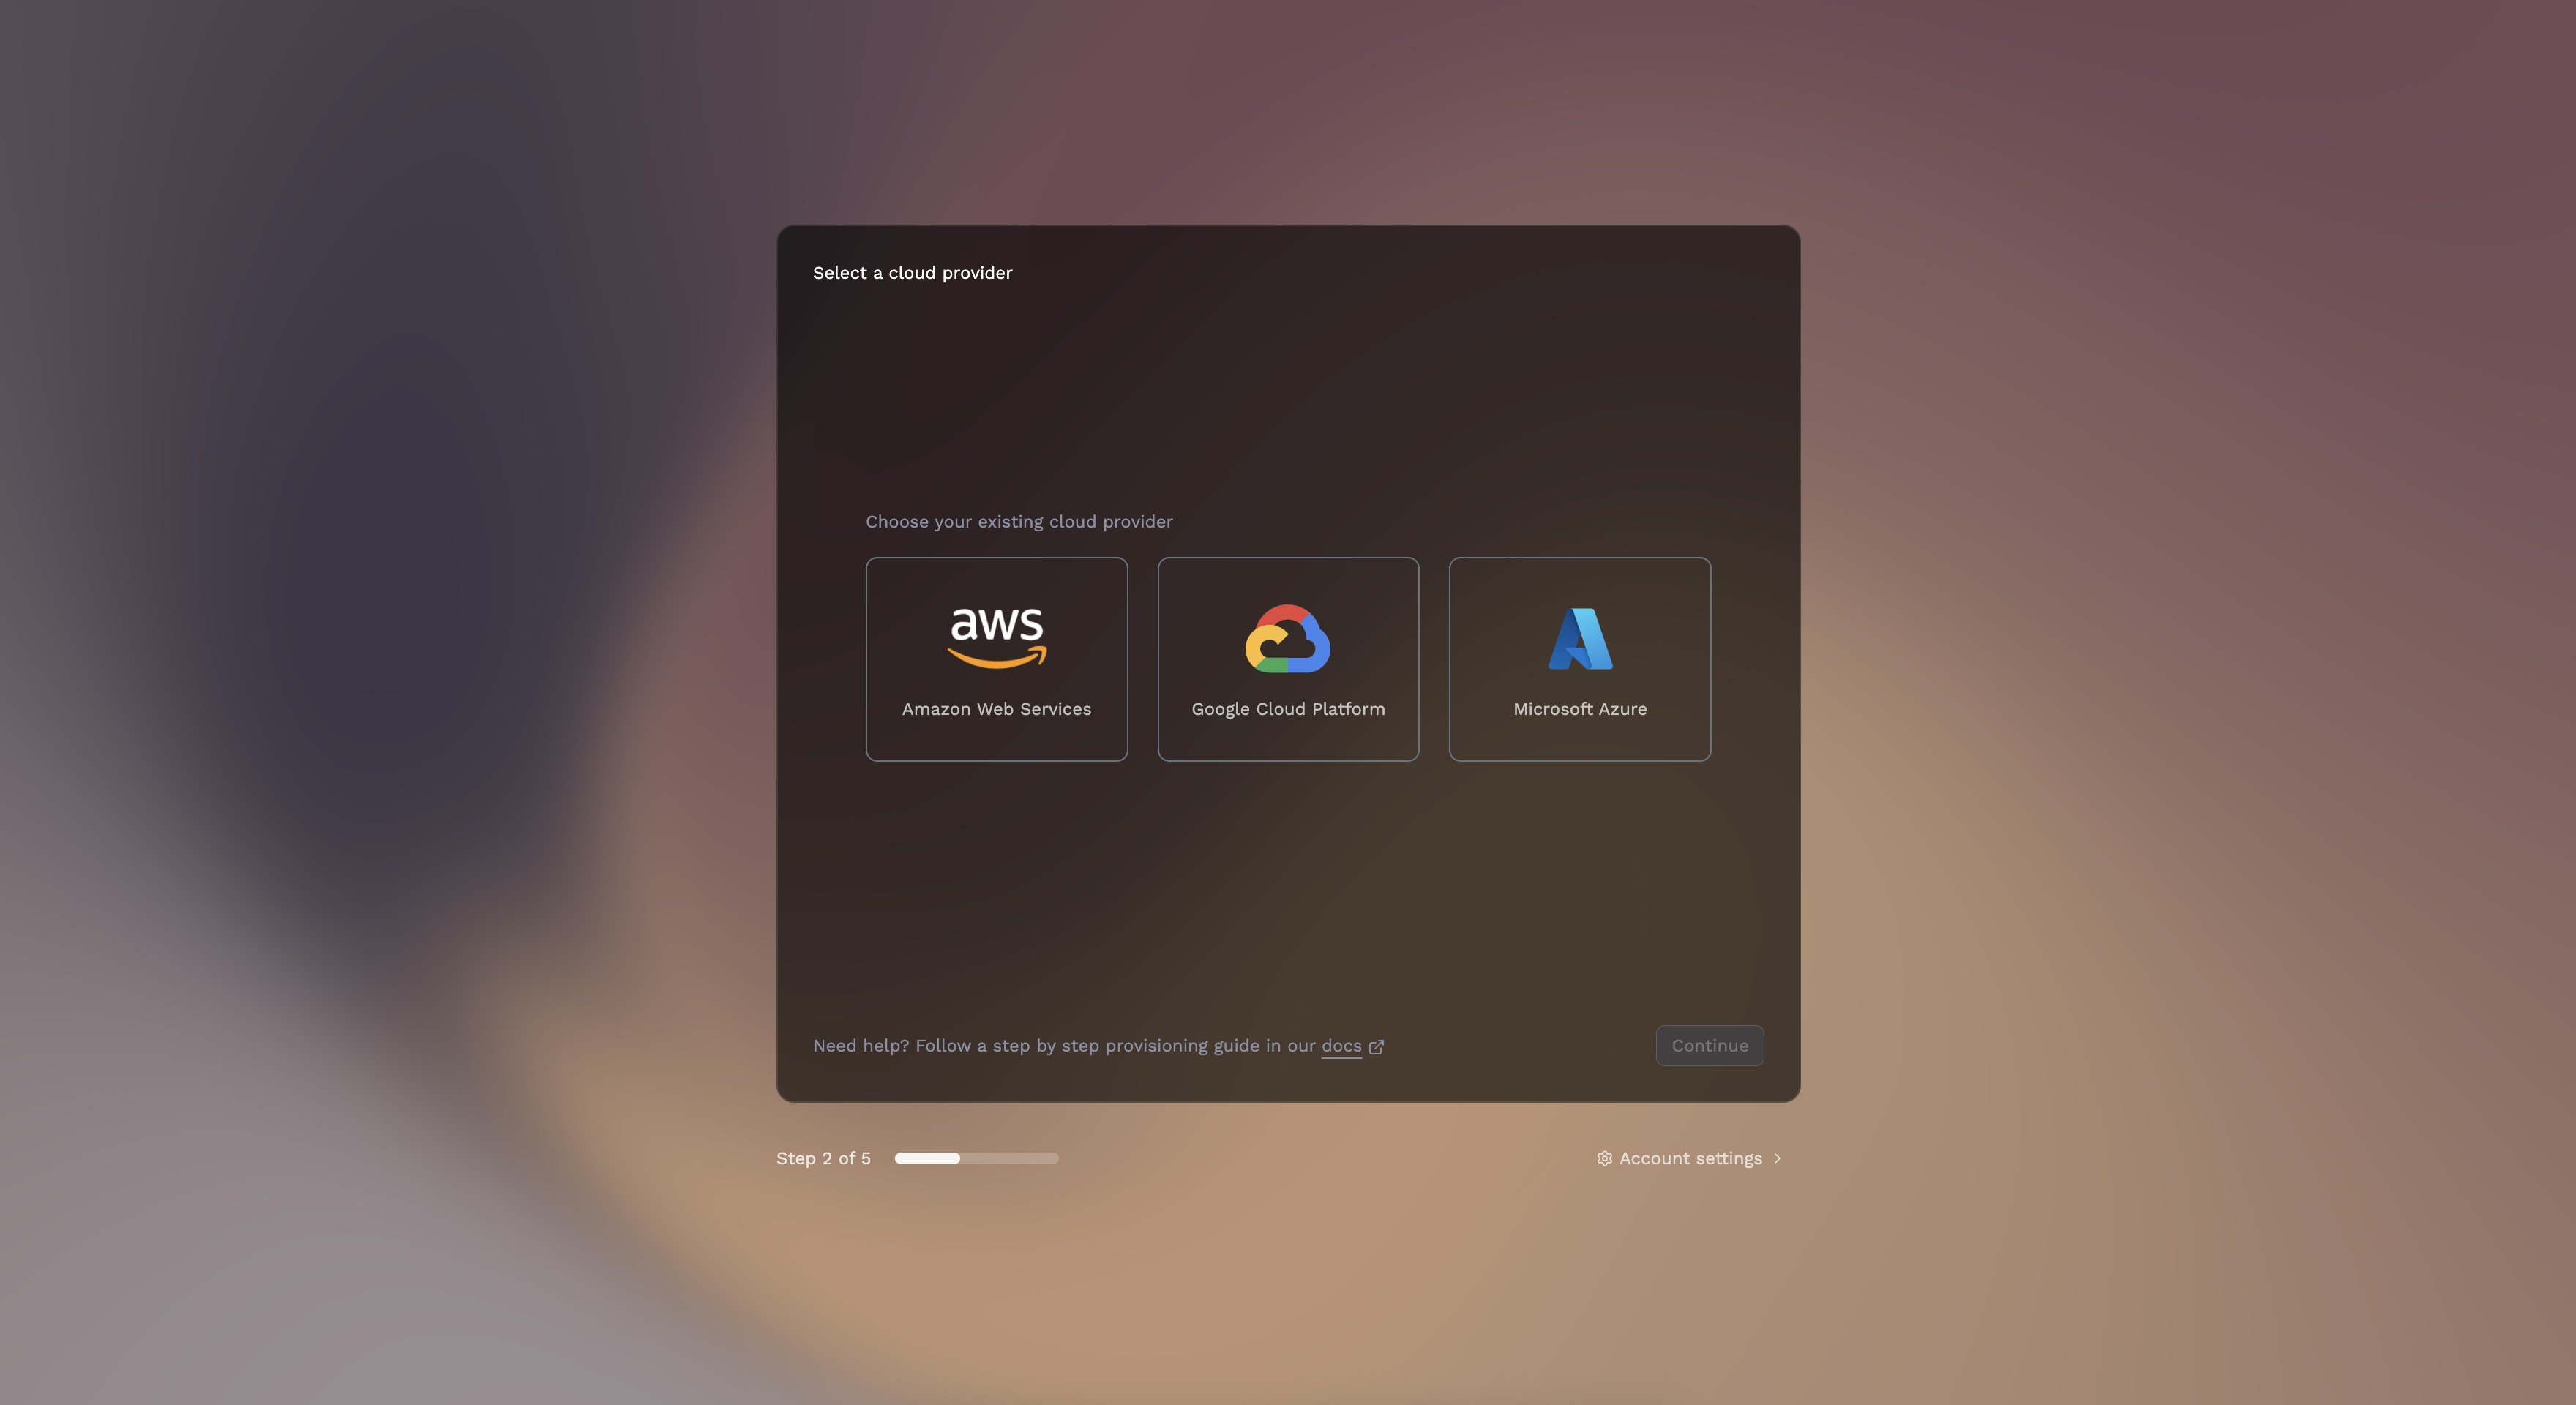
Step 3: Set up your cluster
Porter provisions a Kubernetes cluster in your cloud account. The setup process varies by provider.- AWS
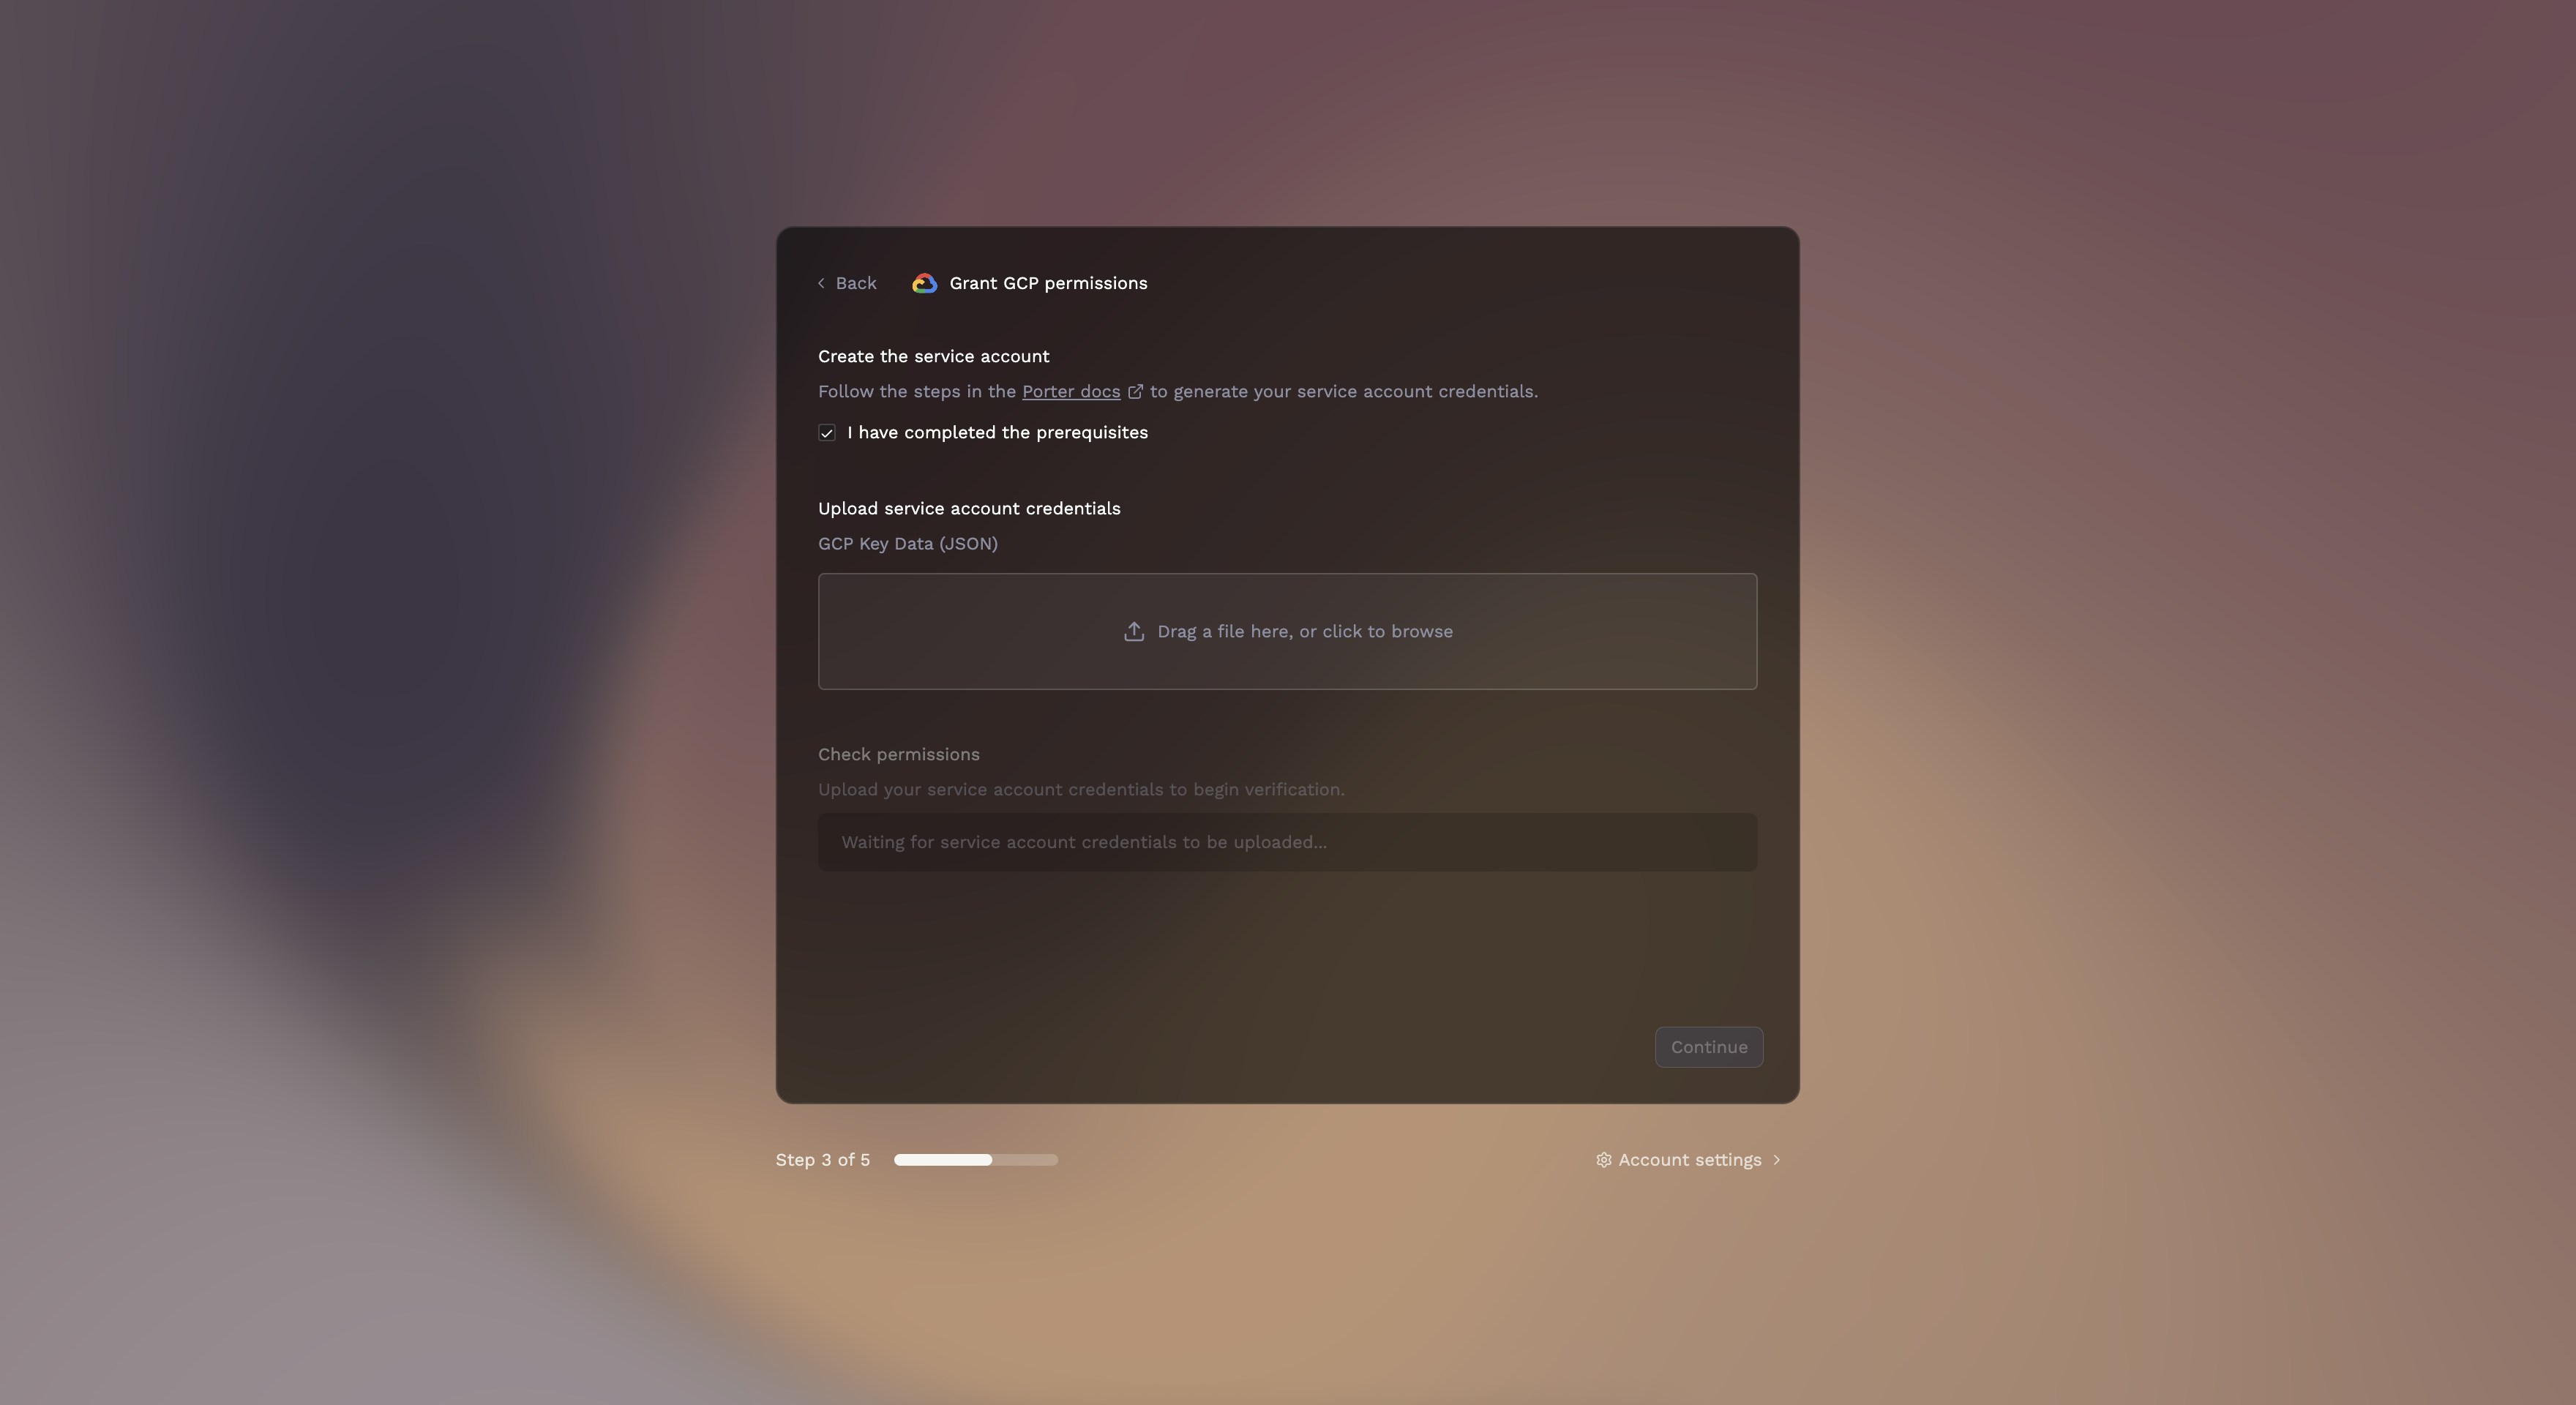
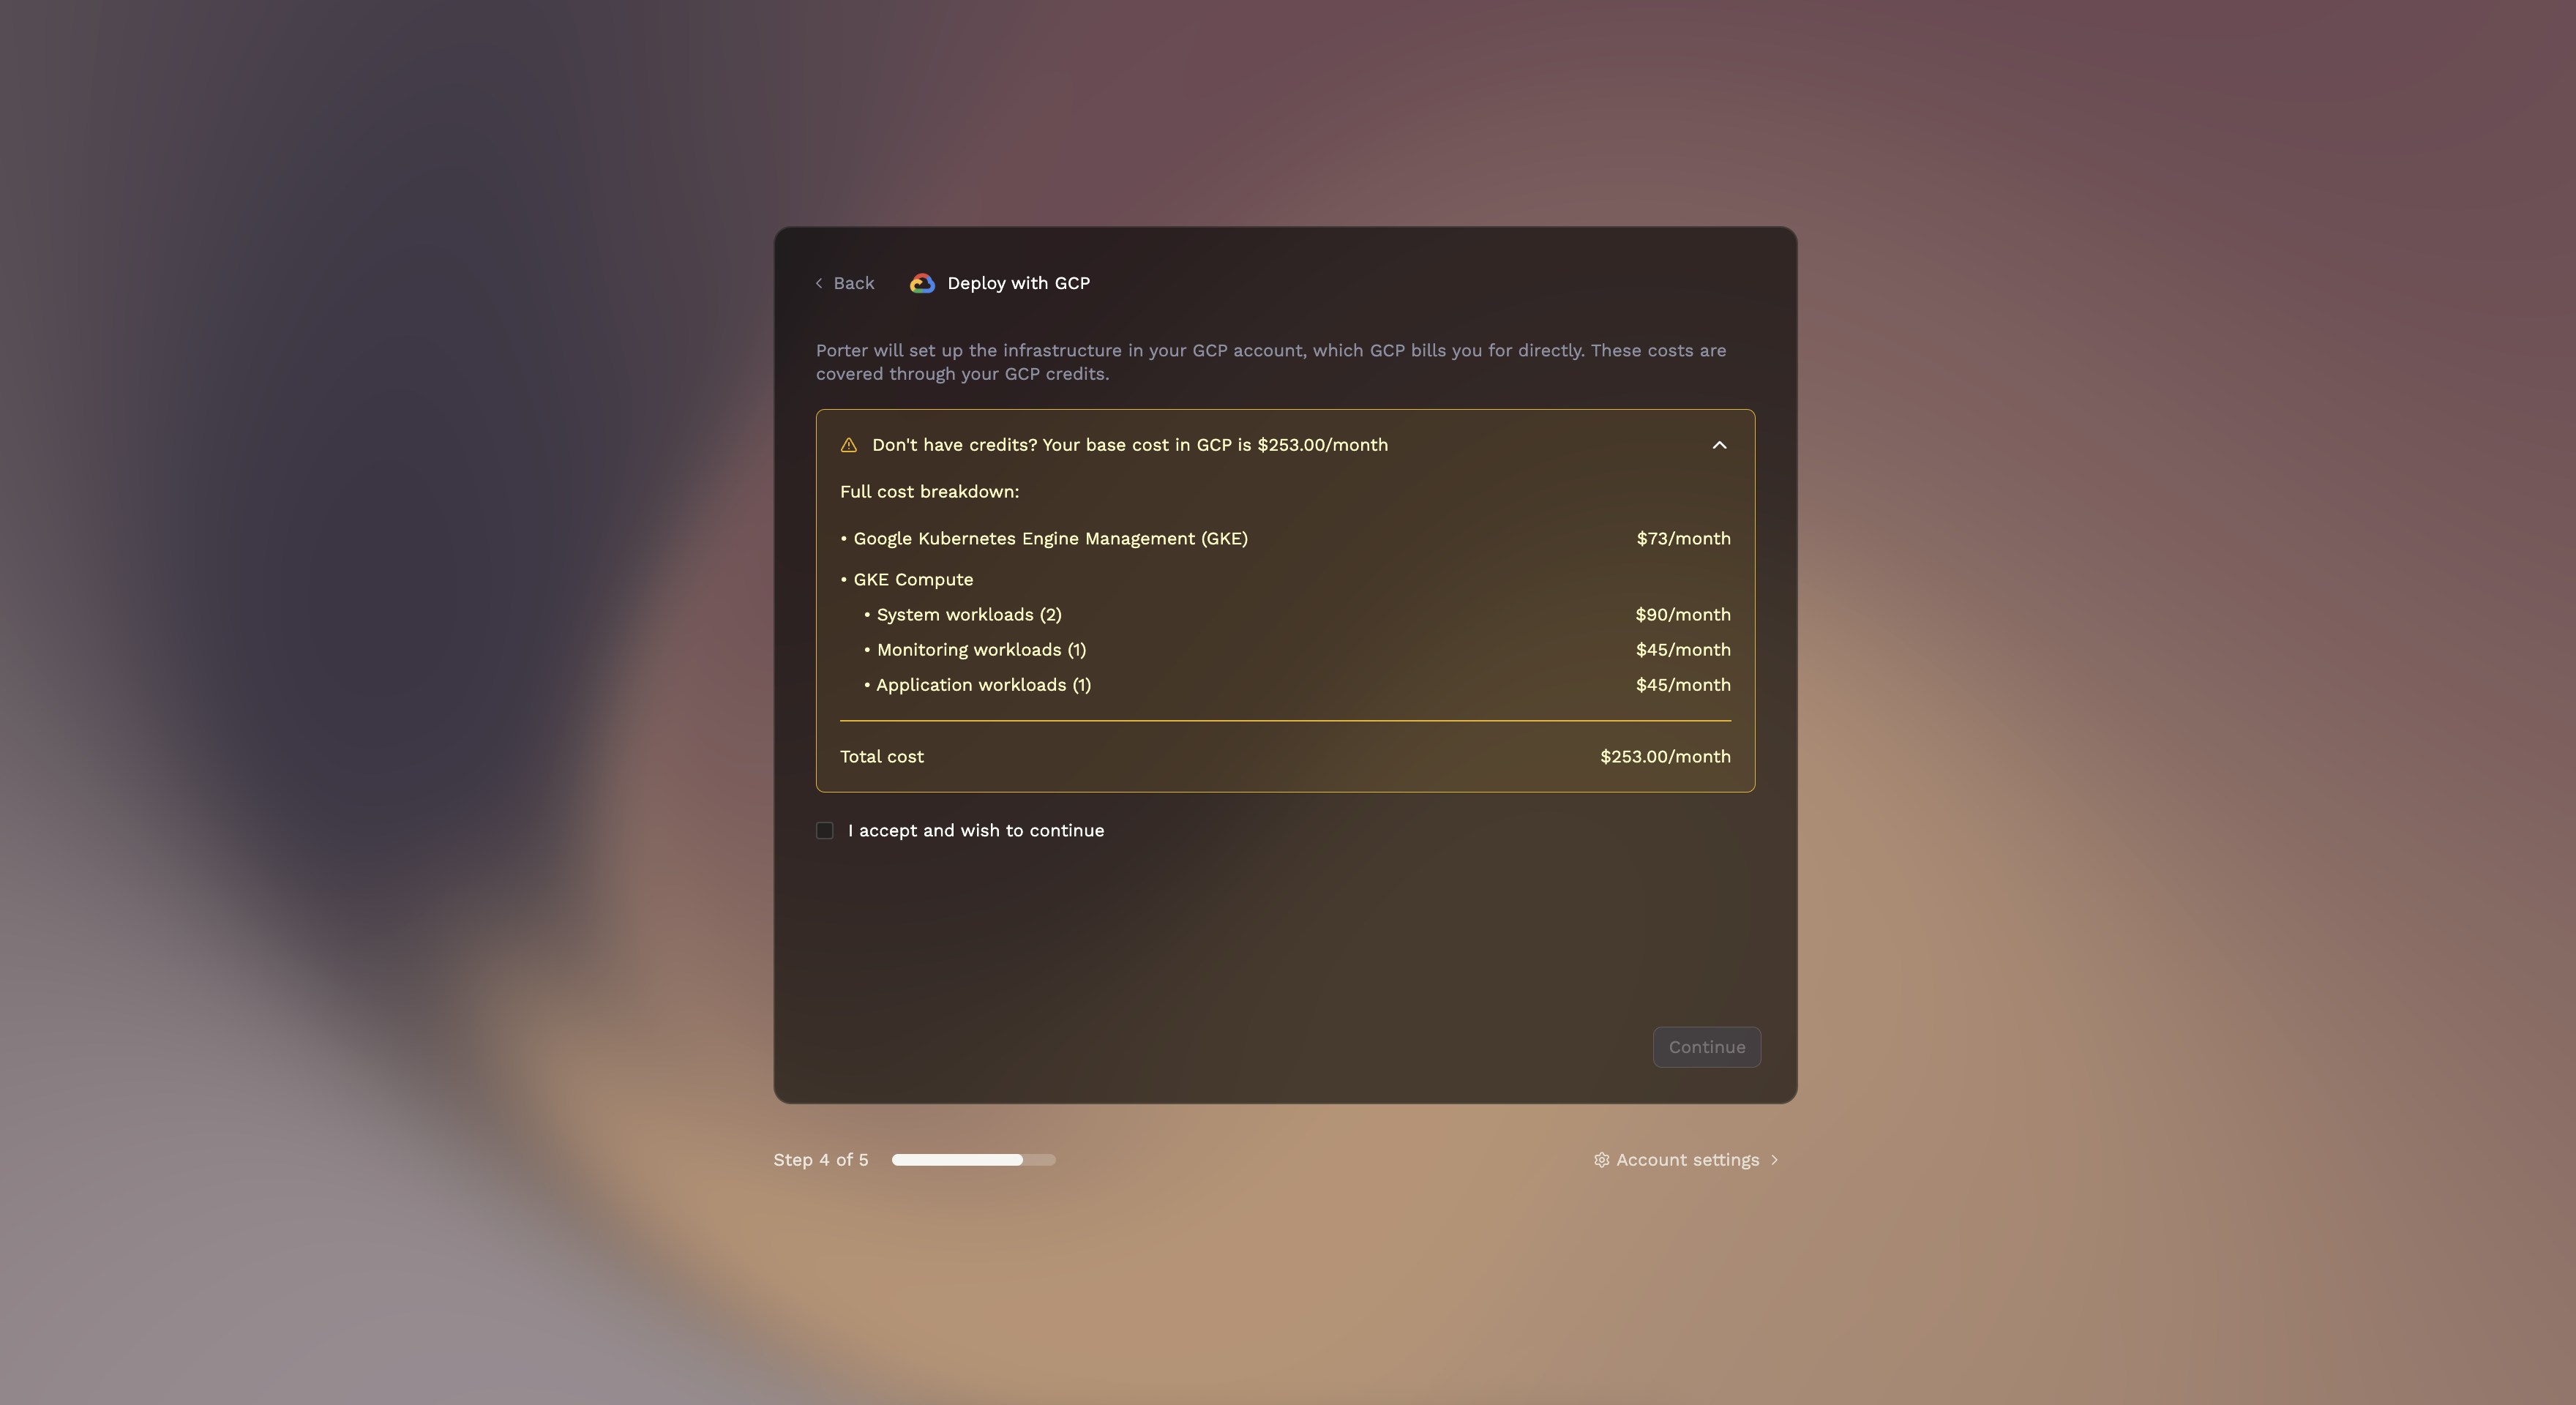
- GCP
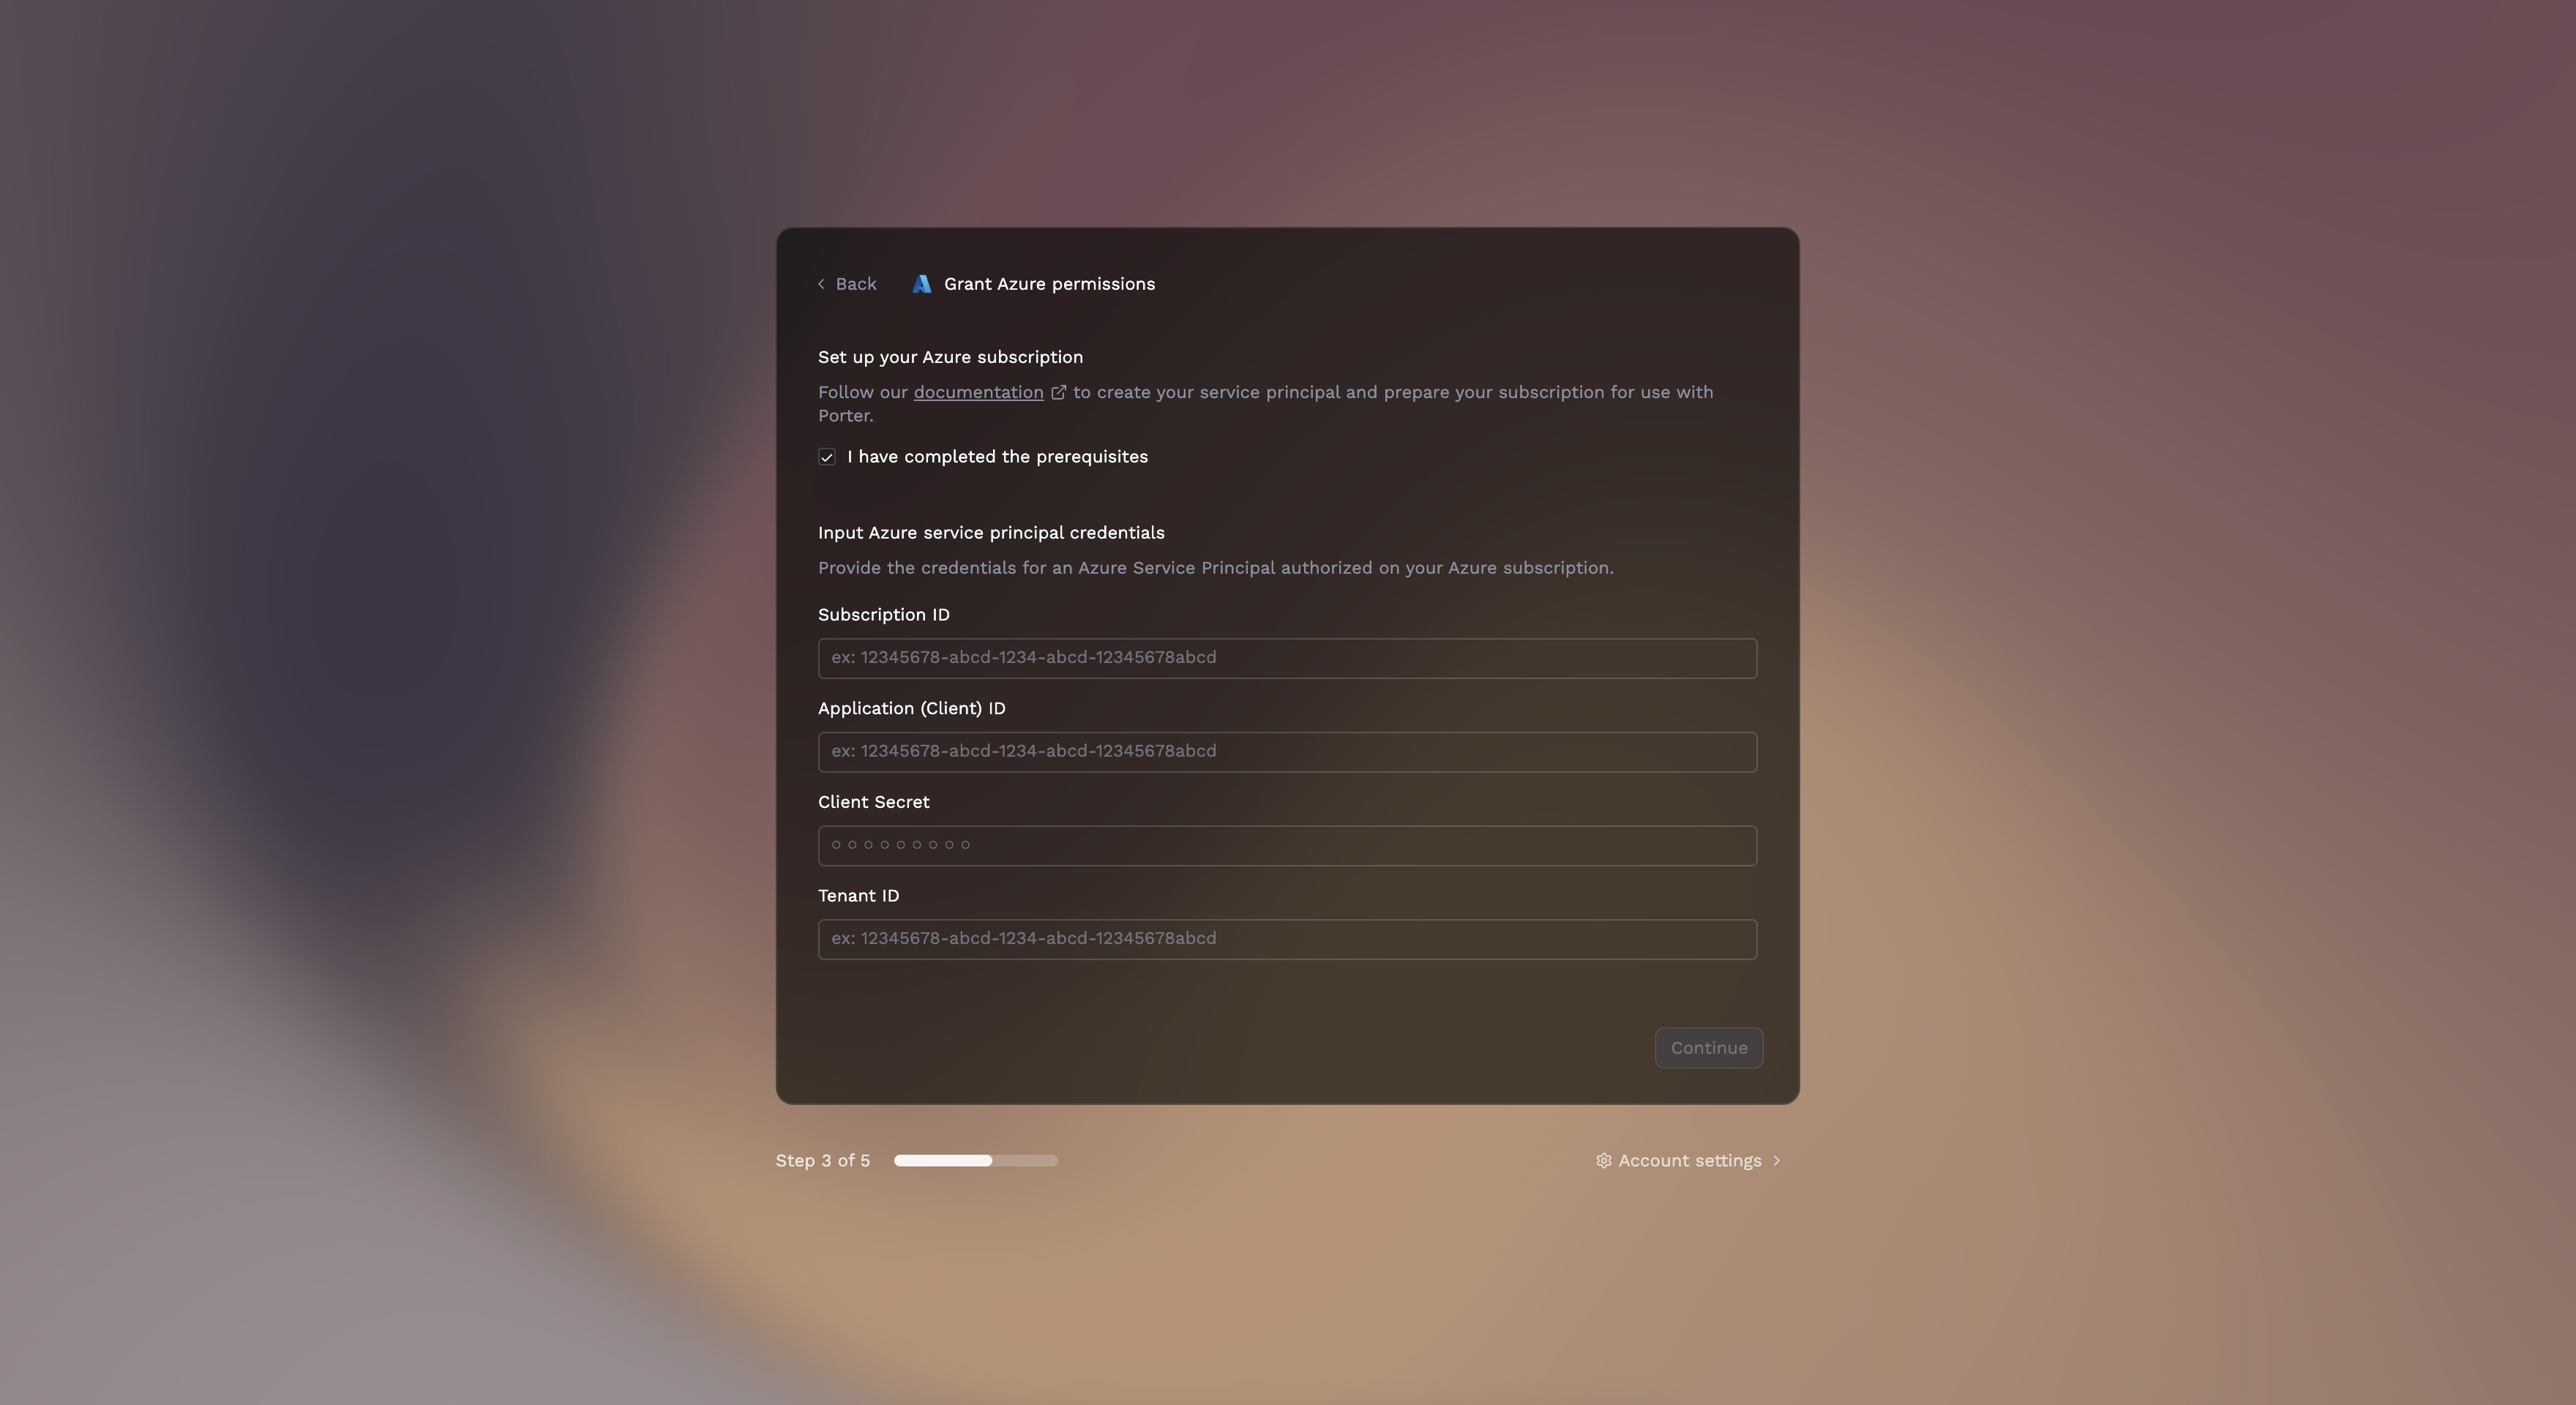
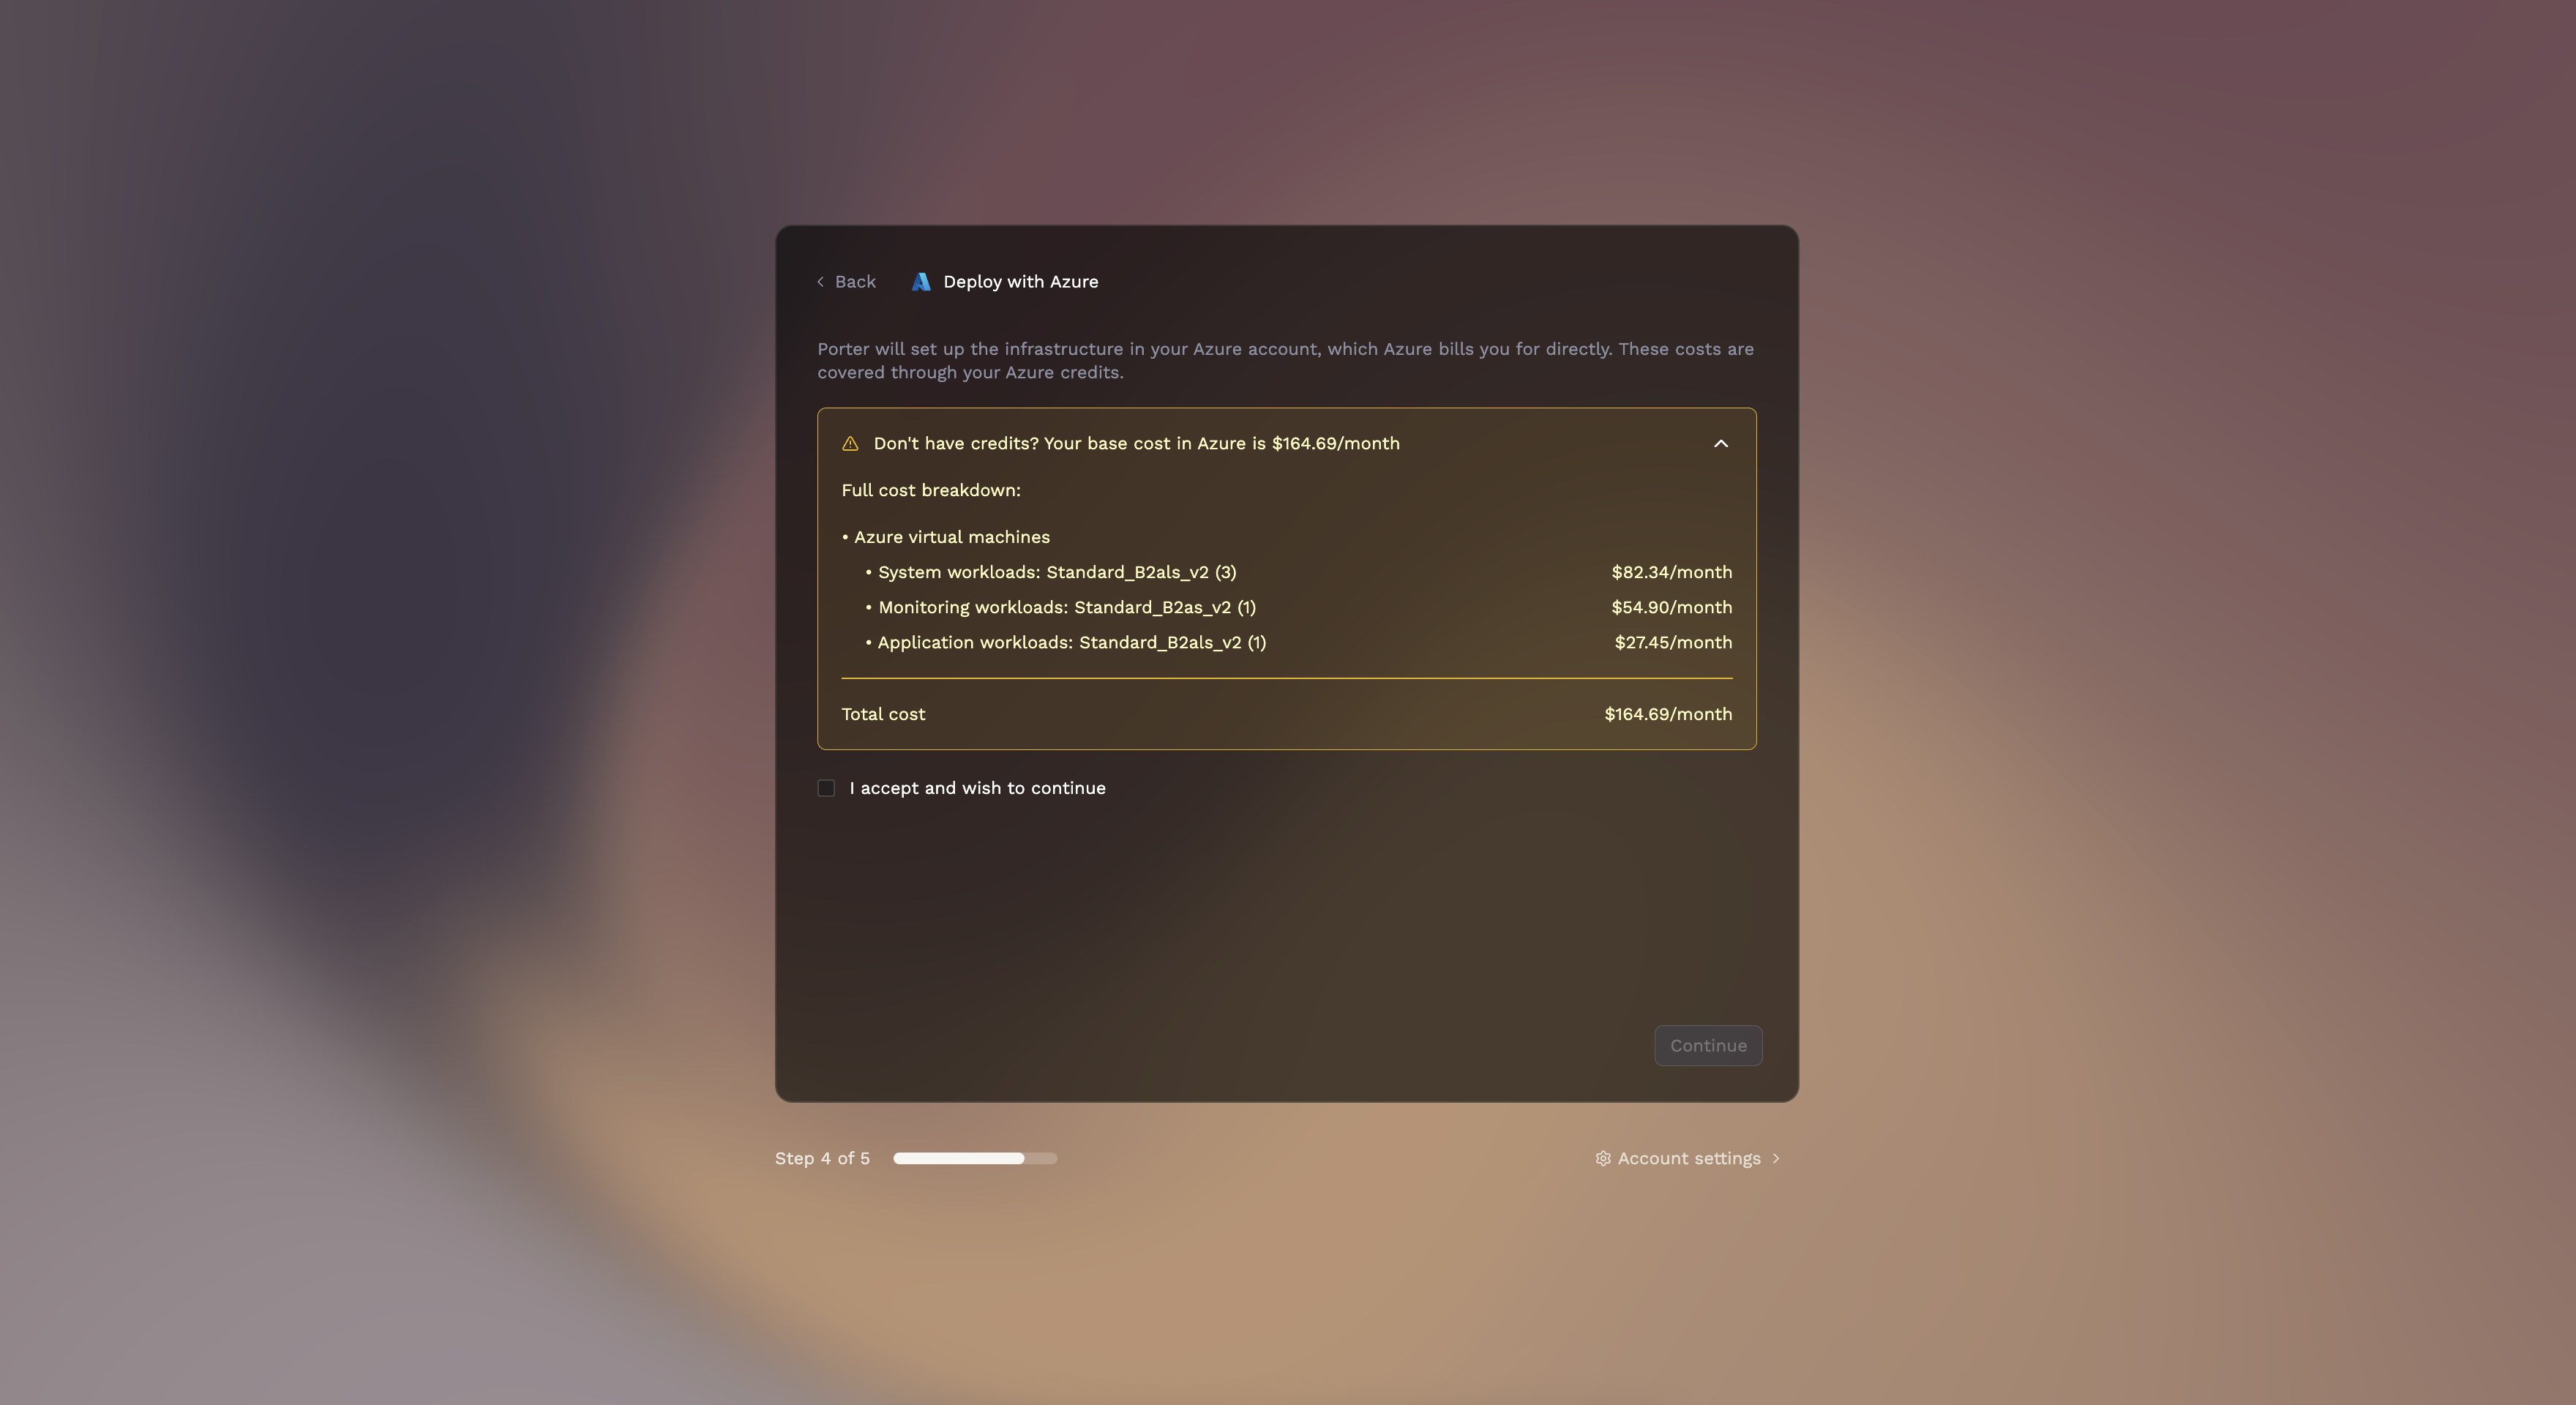
- Azure
Porter uses AWS IAM role assumption to securely access your account without storing static credentials.
1
Enter your AWS Account ID
Log into your AWS Console and find your 12-digit Account ID in the top-right corner. Enter this ID in Porter.
2
Create the CloudFormation stack
Click Grant Permissions. Porter opens the AWS CloudFormation console to create a stack that provisions the 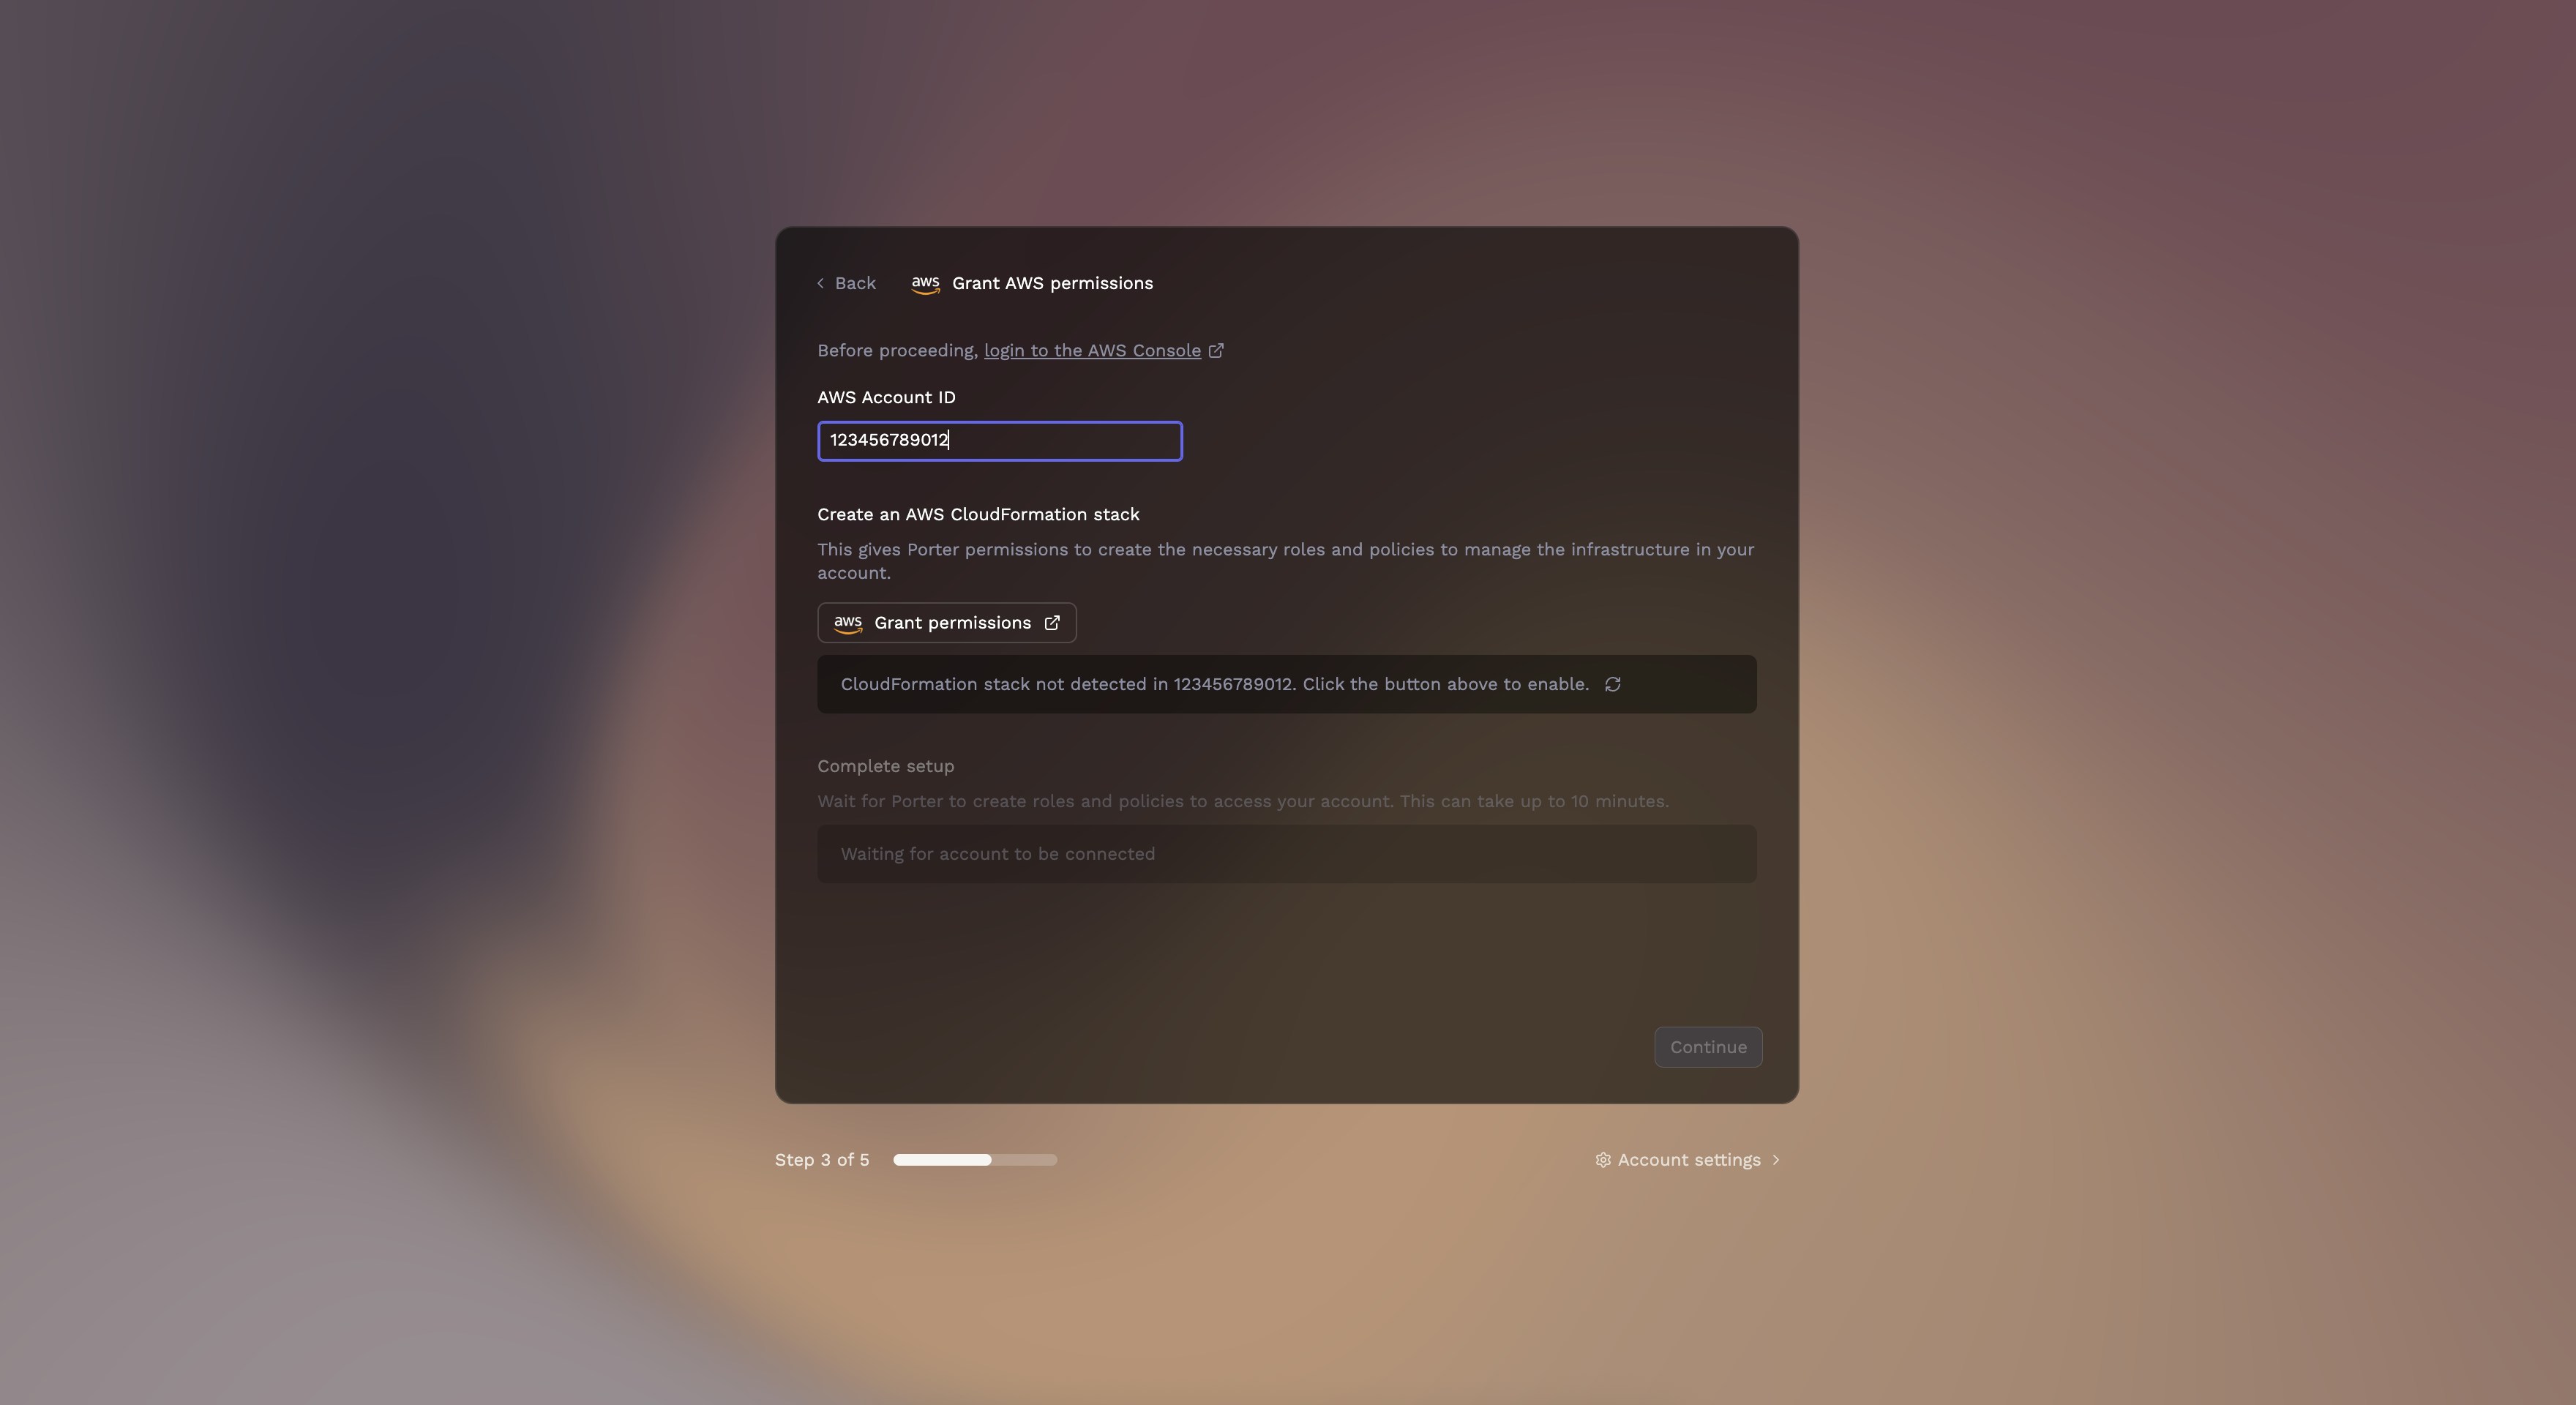
porter-manager IAM role.The IAM role must remain in your AWS account for Porter to manage your infrastructure. Deleting it will prevent Porter from making changes.
3
Review costs
Porter displays estimated monthly costs for your infrastructure (~$225/month for AWS).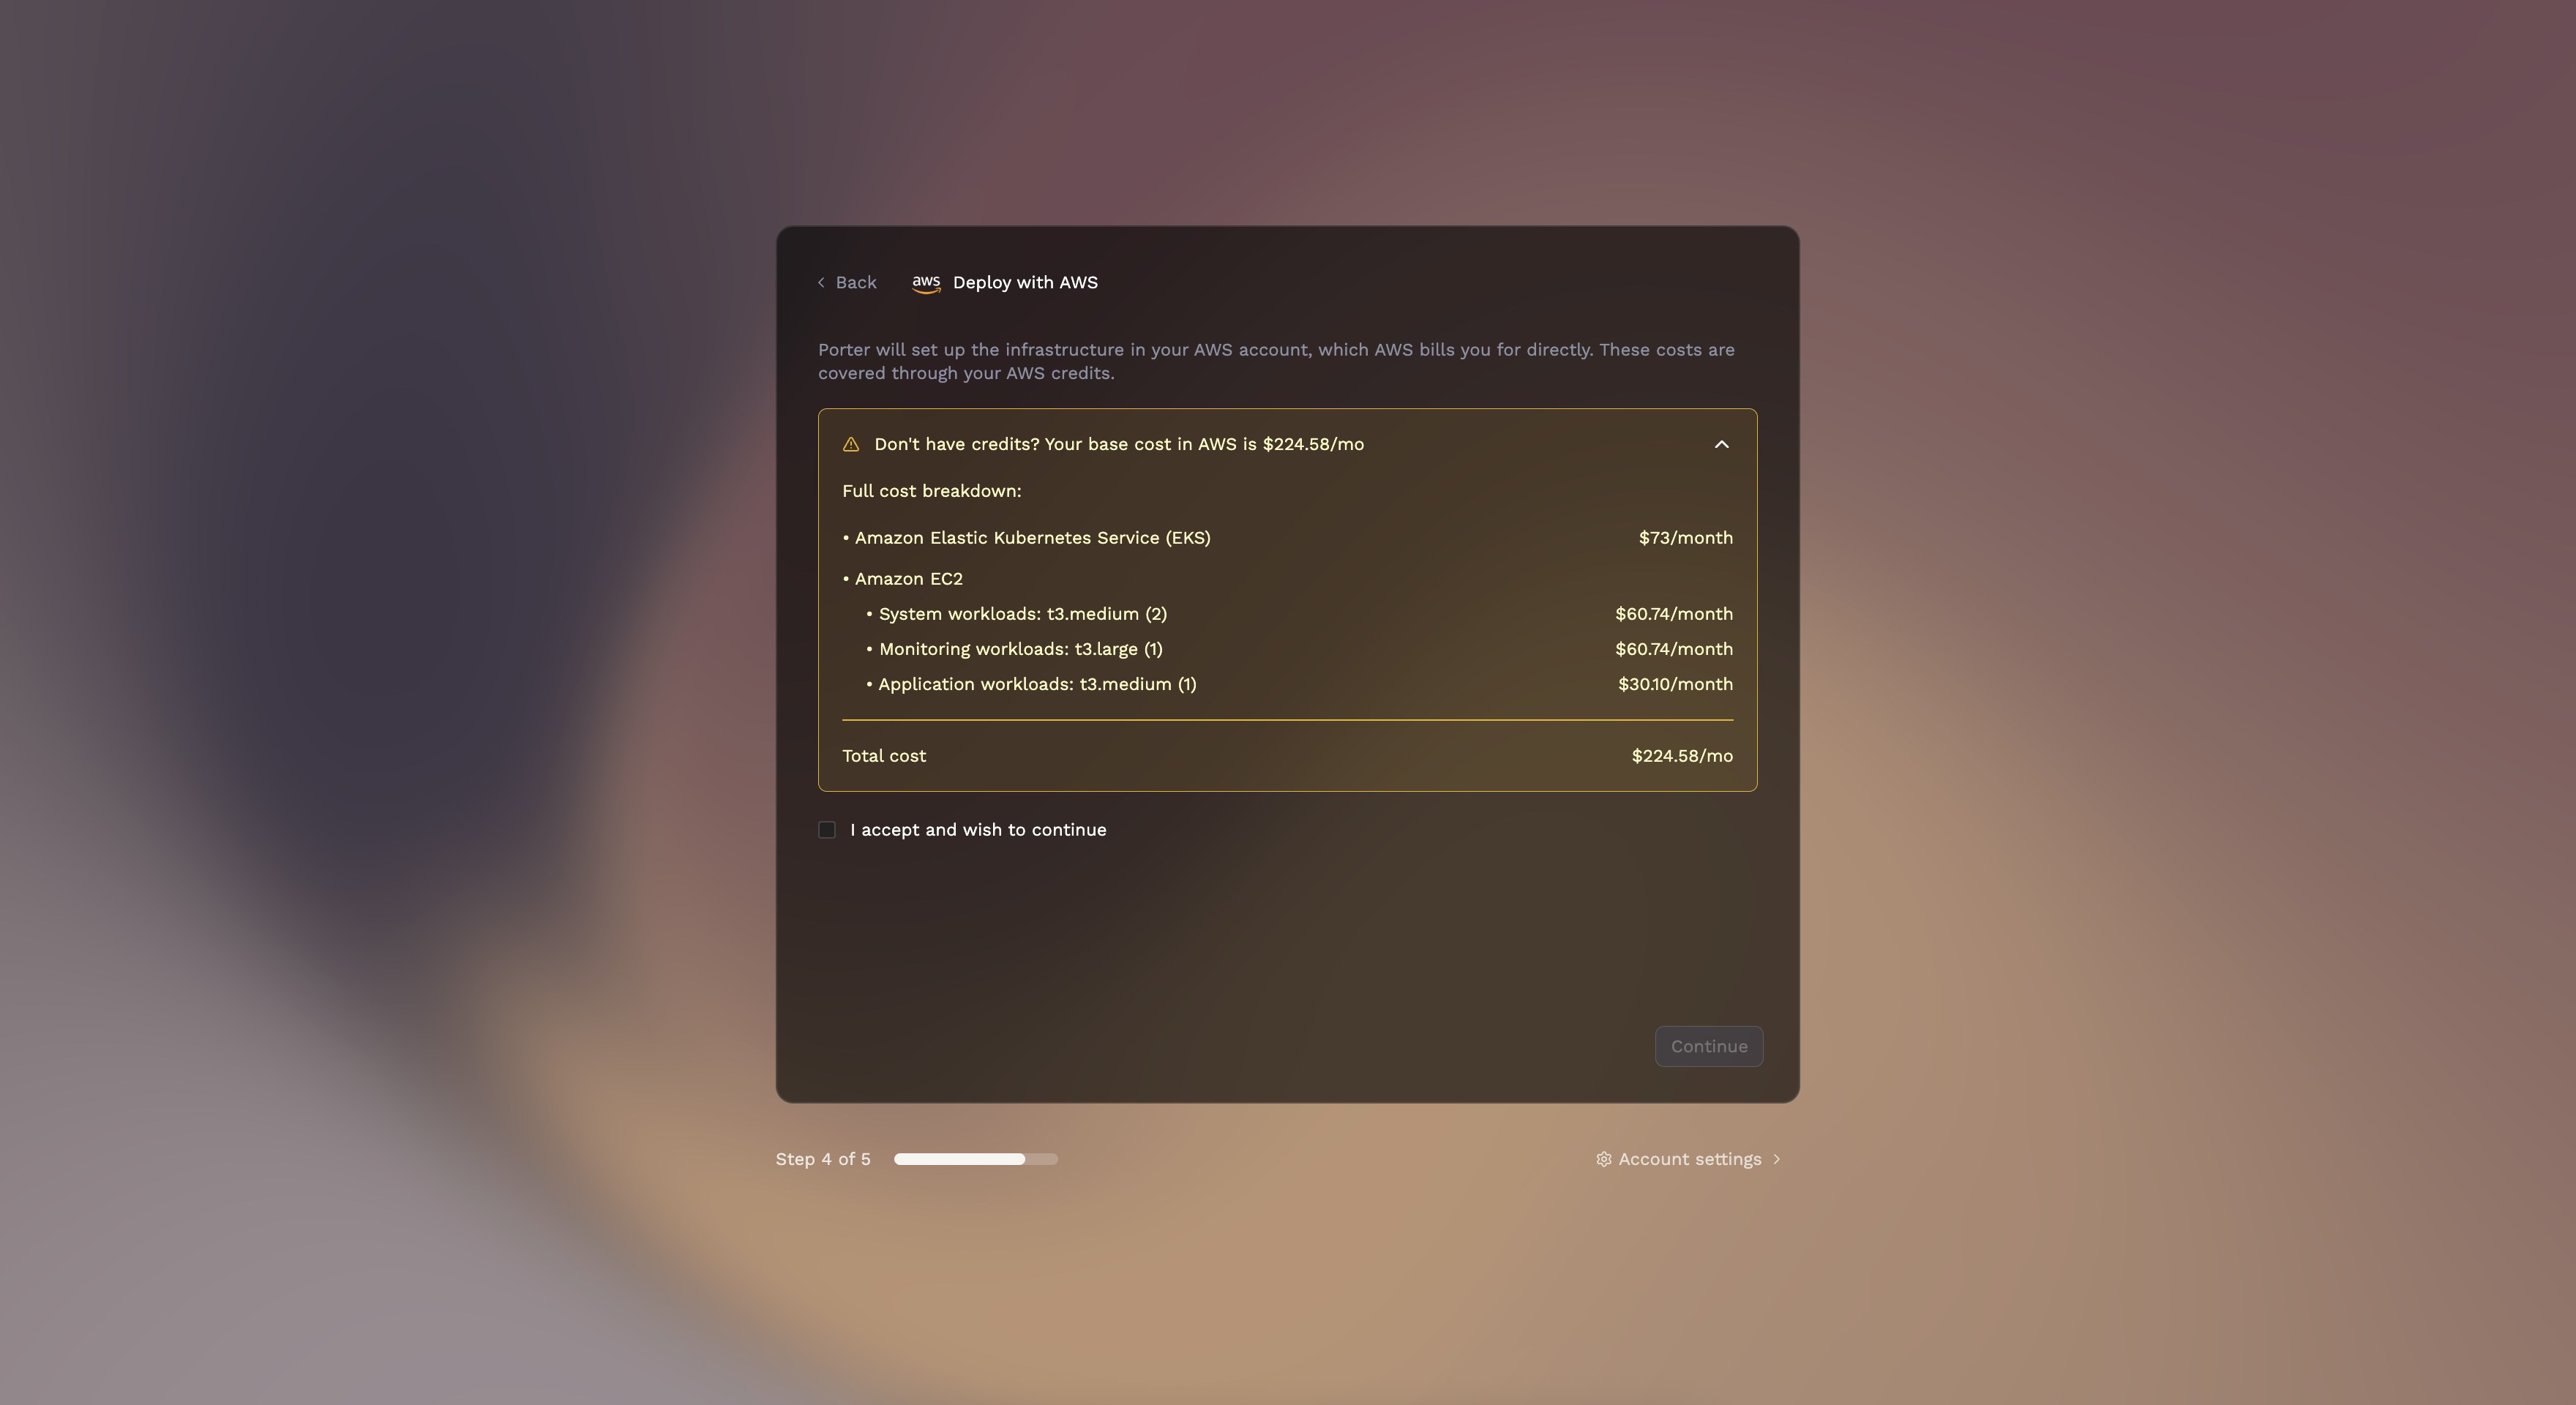
4
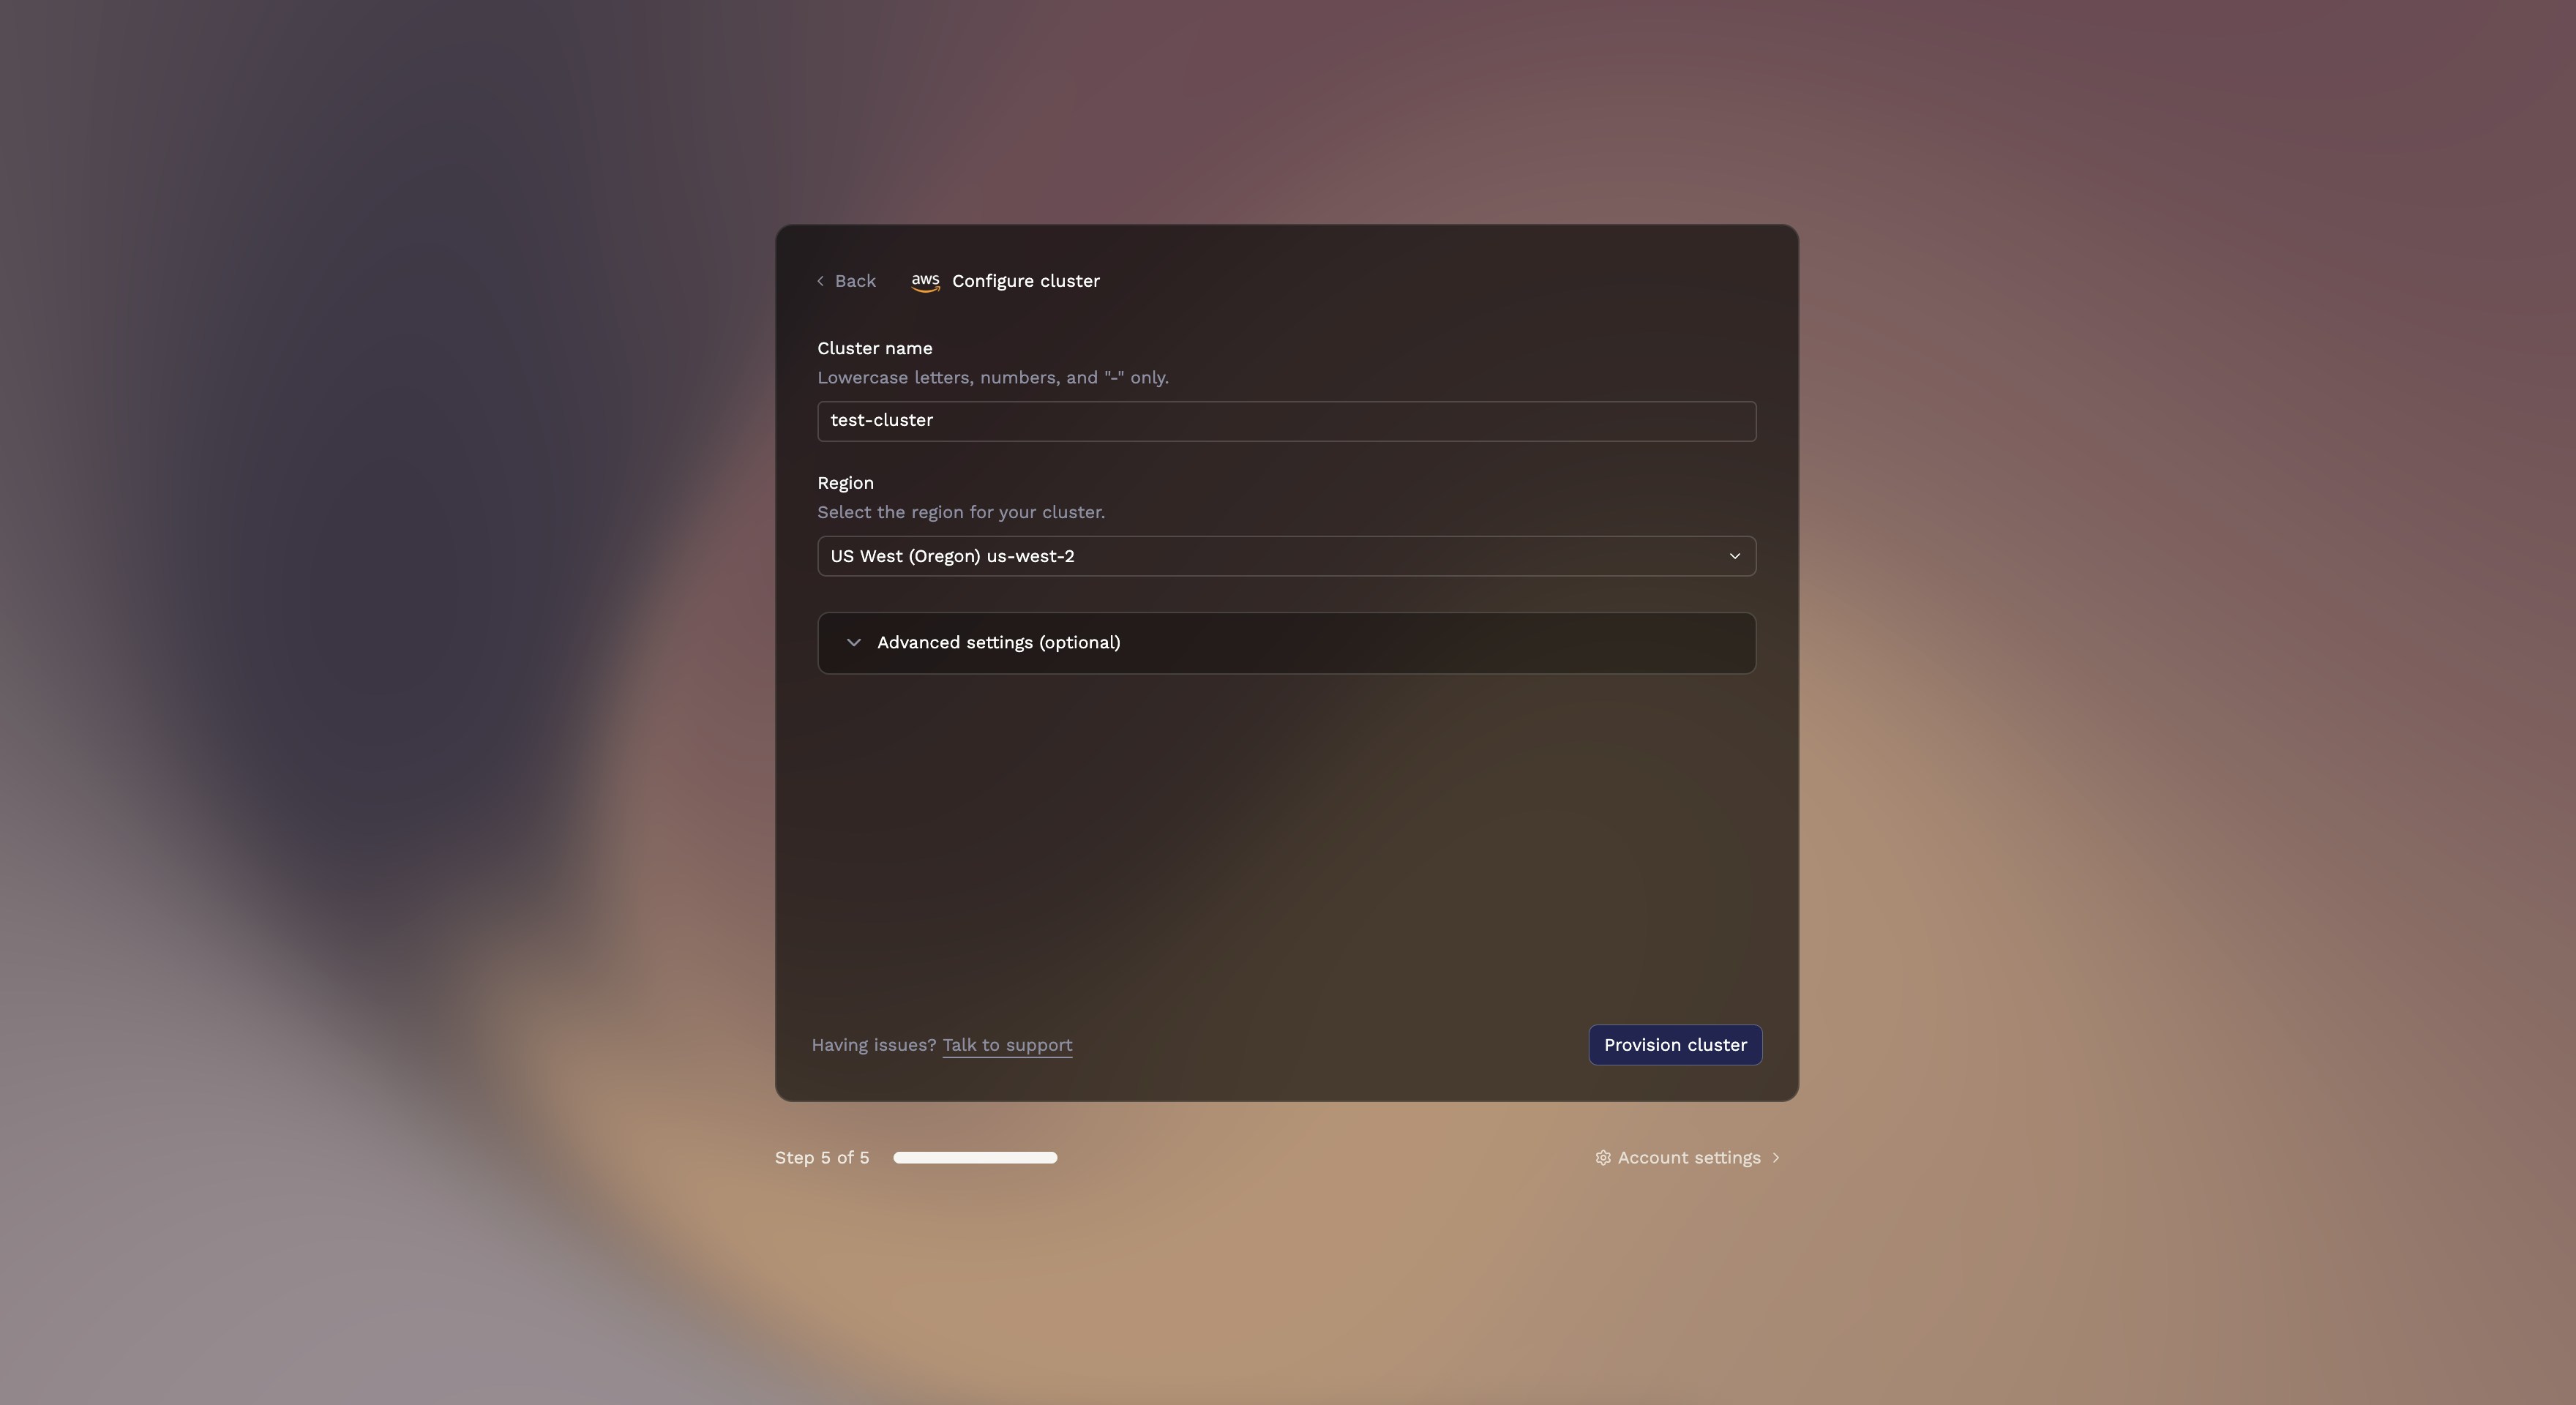
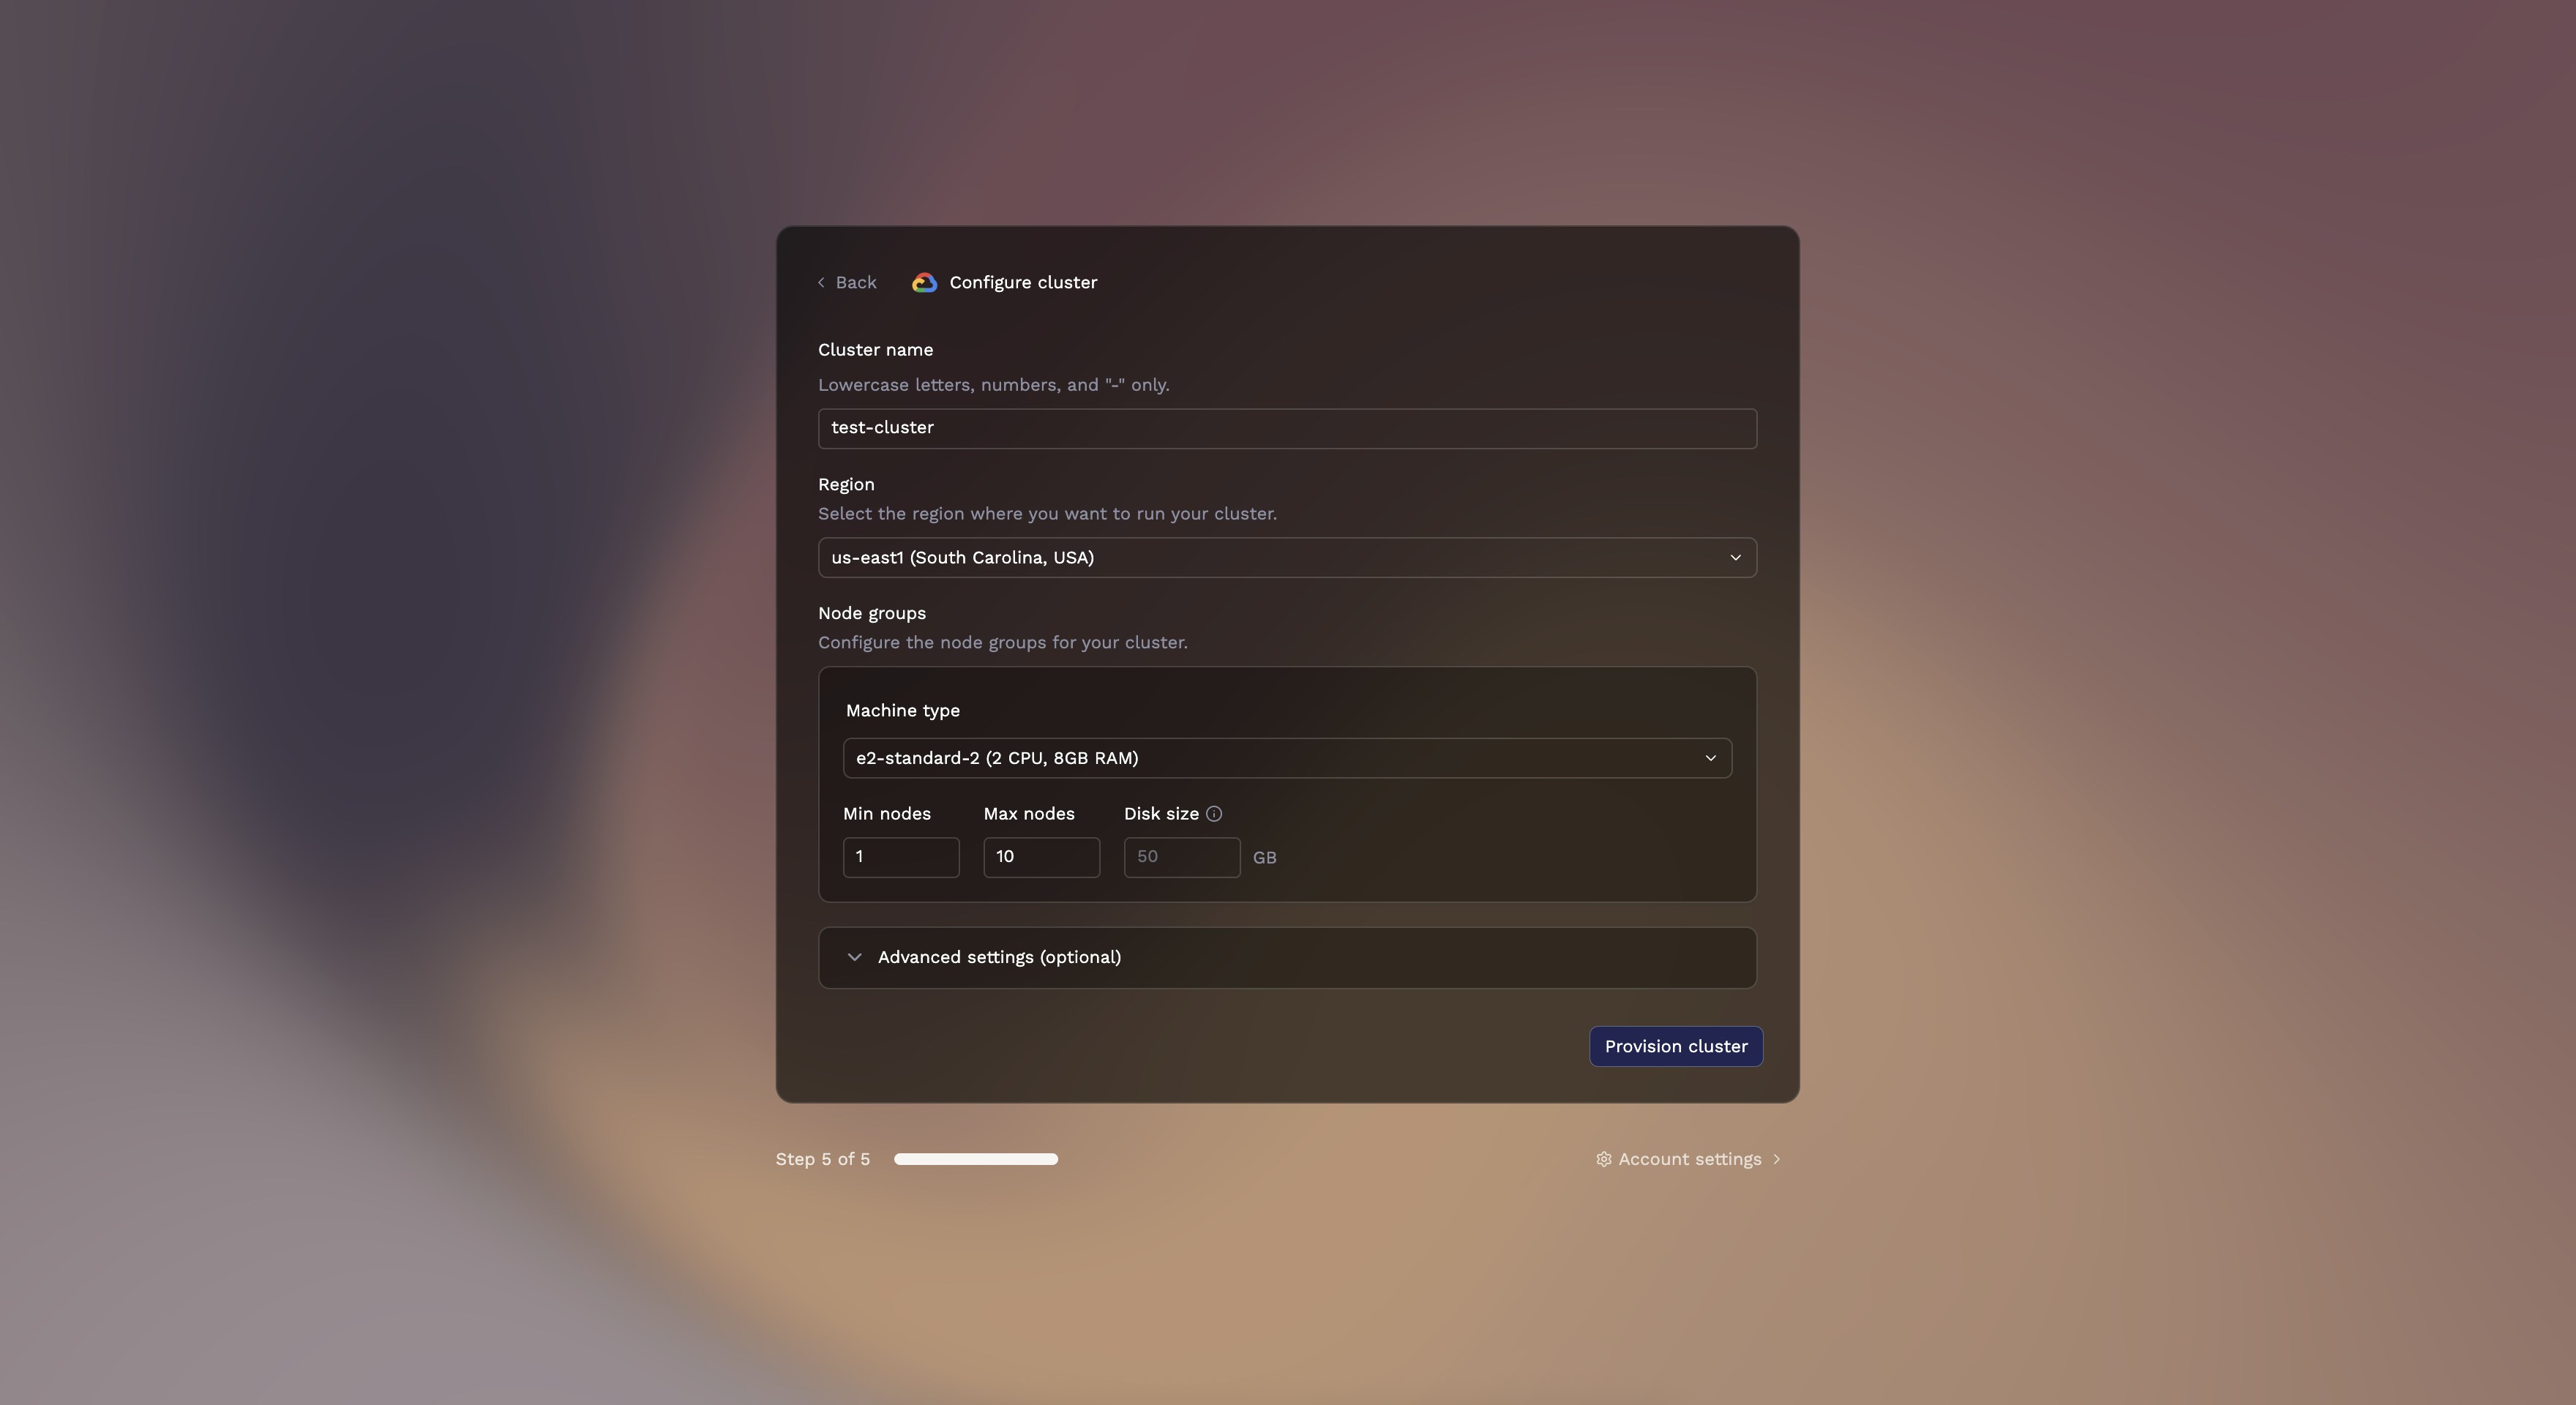
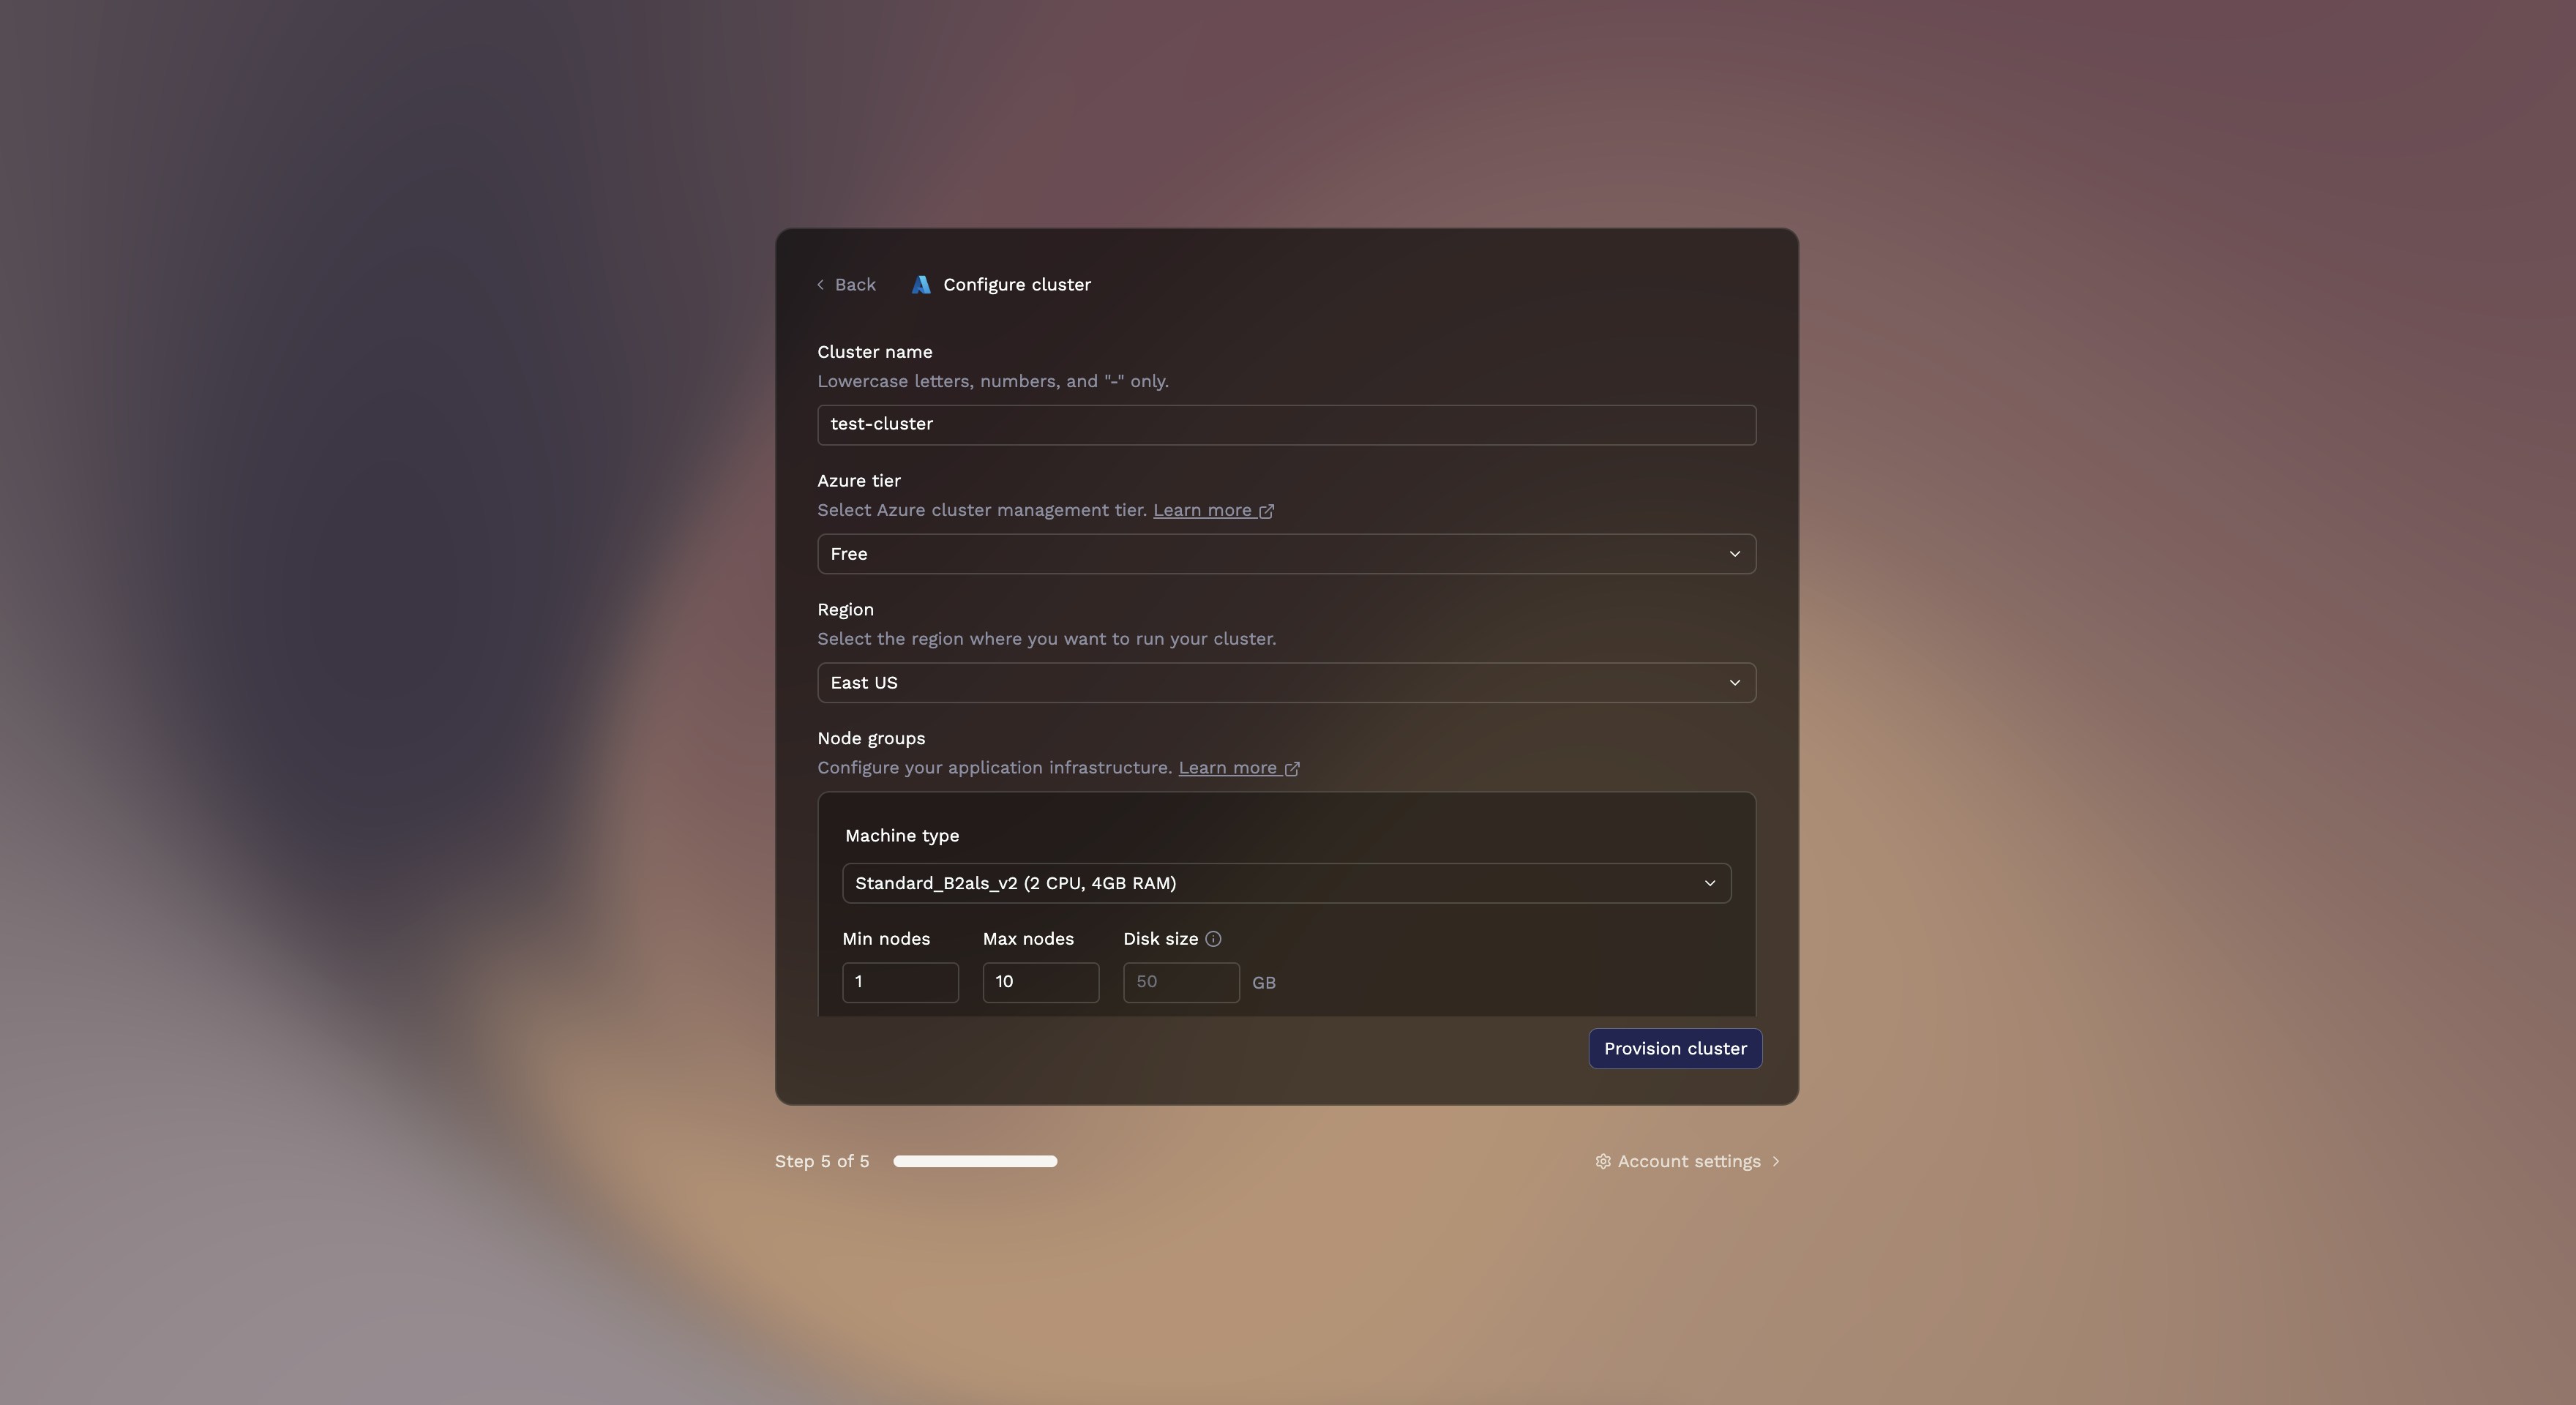
Configure and provision
Porter pre-configures your cluster with sensible defaults:
You can customize these settings or accept the defaults. Click Provision to start creating your infrastructure.
- Cluster name: Auto-generated based on your project
-
Region: Defaults to
us-east-1 -
Node groups: Pre-configured with appropriate instance types
AWS resource quota limits
AWS resource quota limits
If AWS is limiting your account’s resource quota, Porter will display a warning and offer to auto-request quota increases on your behalf. Allow Porter to auto-request AWS quota is enabled by default.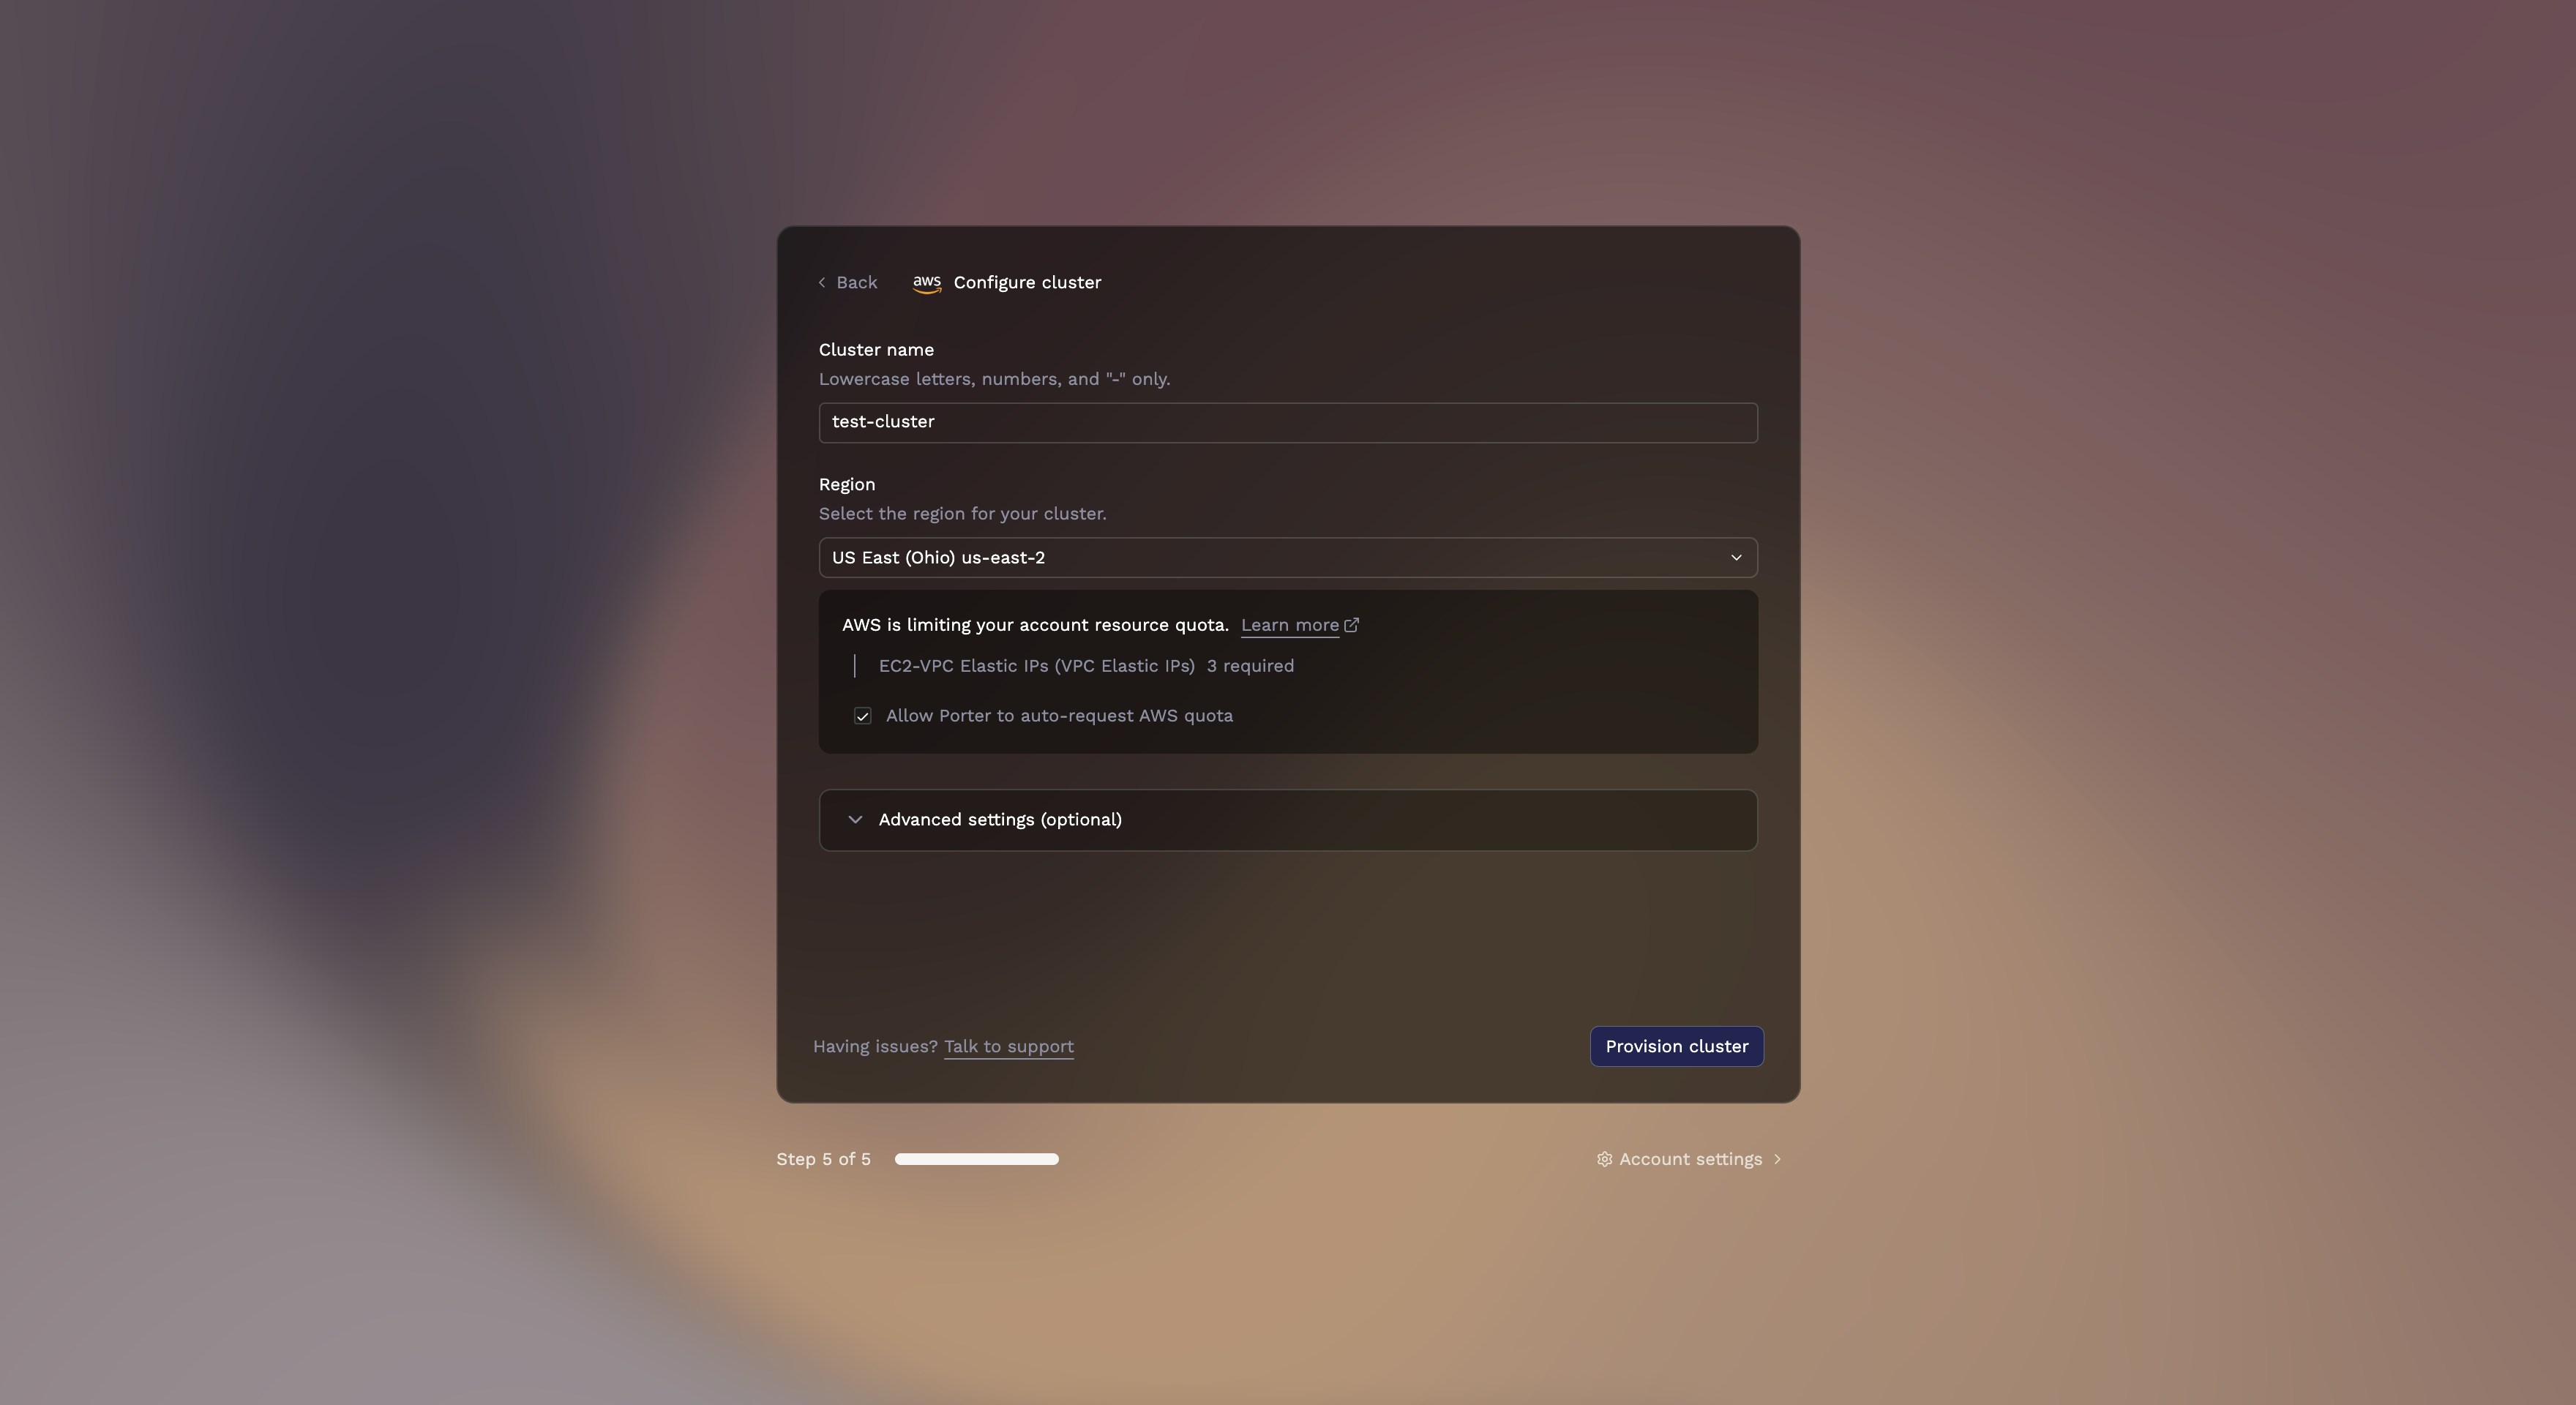
Step 4: Create your first application
Once your cluster is ready, you’ll see the Porter dashboard. Click Create Application to deploy your code.- Deploy from a GitHub repository
- Deploy from a Docker registry
Porter builds your application from source code and sets up automated deployments on every push.
1
Connect GitHub
If this is your first deployment, you’ll need to connect your GitHub account:
- Click Connect repositories
- Authorize the Porter GitHub App
- Choose which repositories Porter can access (all repositories or select specific ones)
2
Select your repository
- Choose the repository containing your application
-
Select the branch to deploy (defaults to
mainormaster)
3
Review detected applications
Porter scans your repository and automatically detects:
- Frameworks and languages (Node.js, Python, Go, etc.)
- Dockerfiles
-
Service types (web servers, workers, etc.)
For monorepos with multiple services, Porter detects each application separately. A Node.js API in
/api and a React frontend in /web appear as distinct applications.4
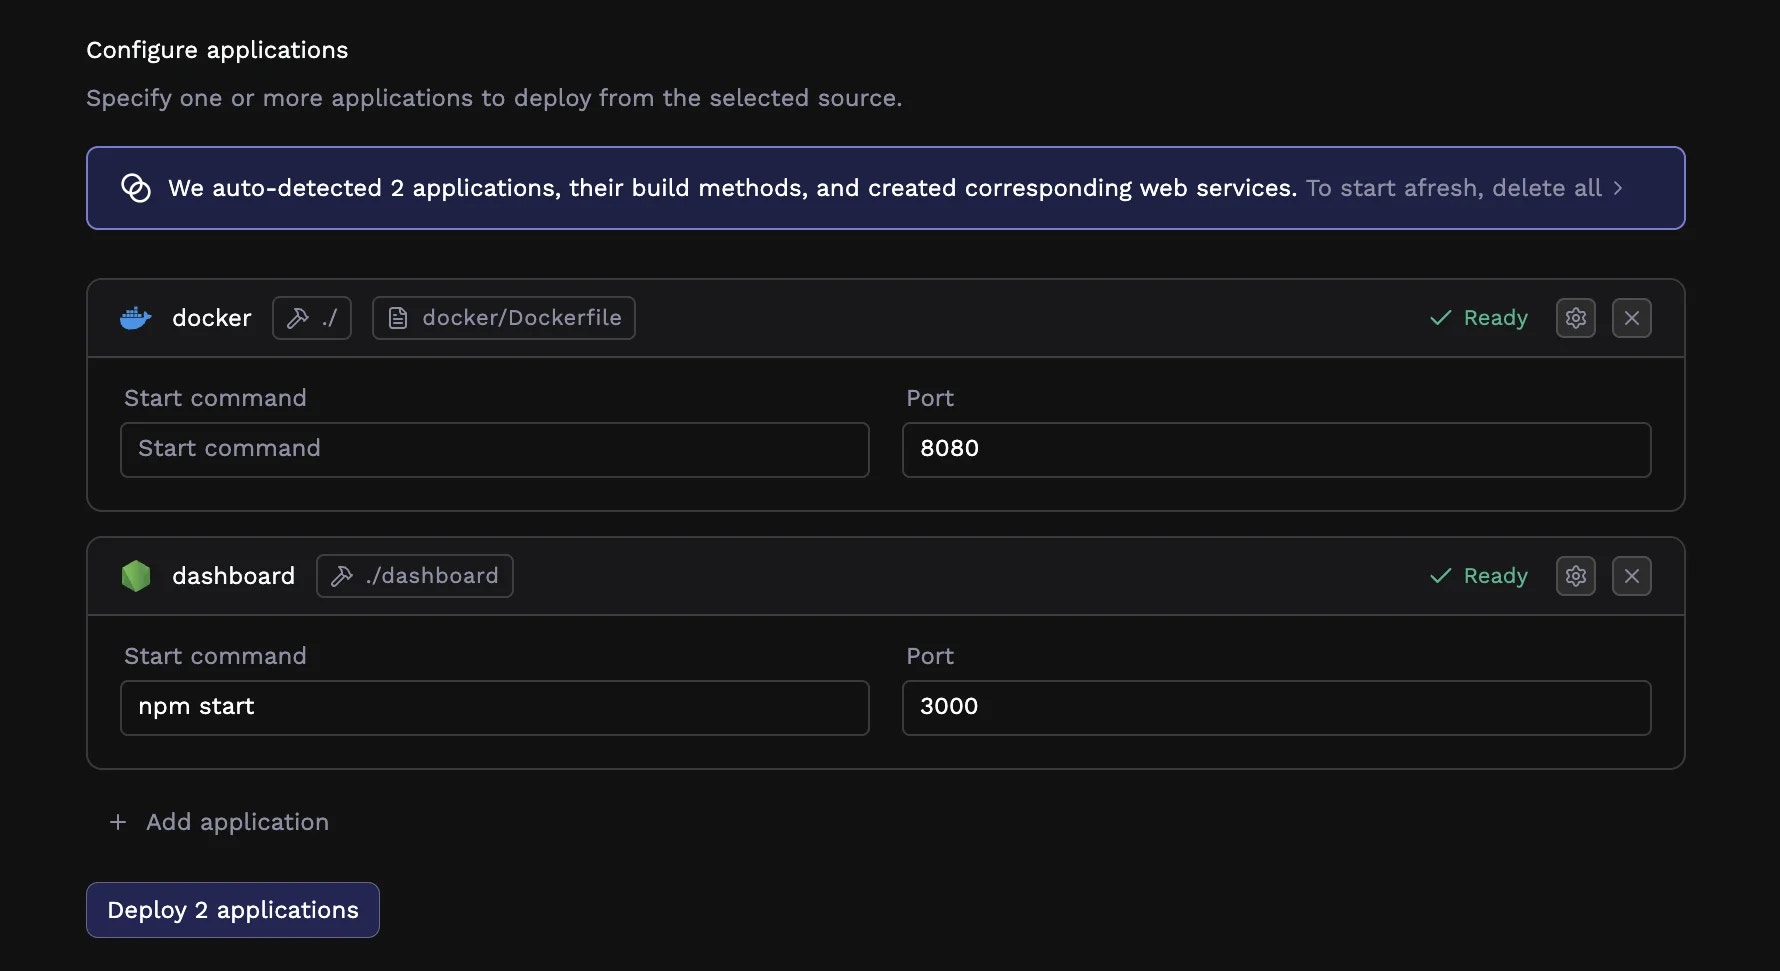
Configure your application (optional)
Click the gear icon on any application card to customize:
- Build method: Docker (using your Dockerfile) or Buildpacks (automatic)
- Start command: The command to run your application
- Port: The port your application listens on
5
Deploy
Click Deploy to start your deployment.
6
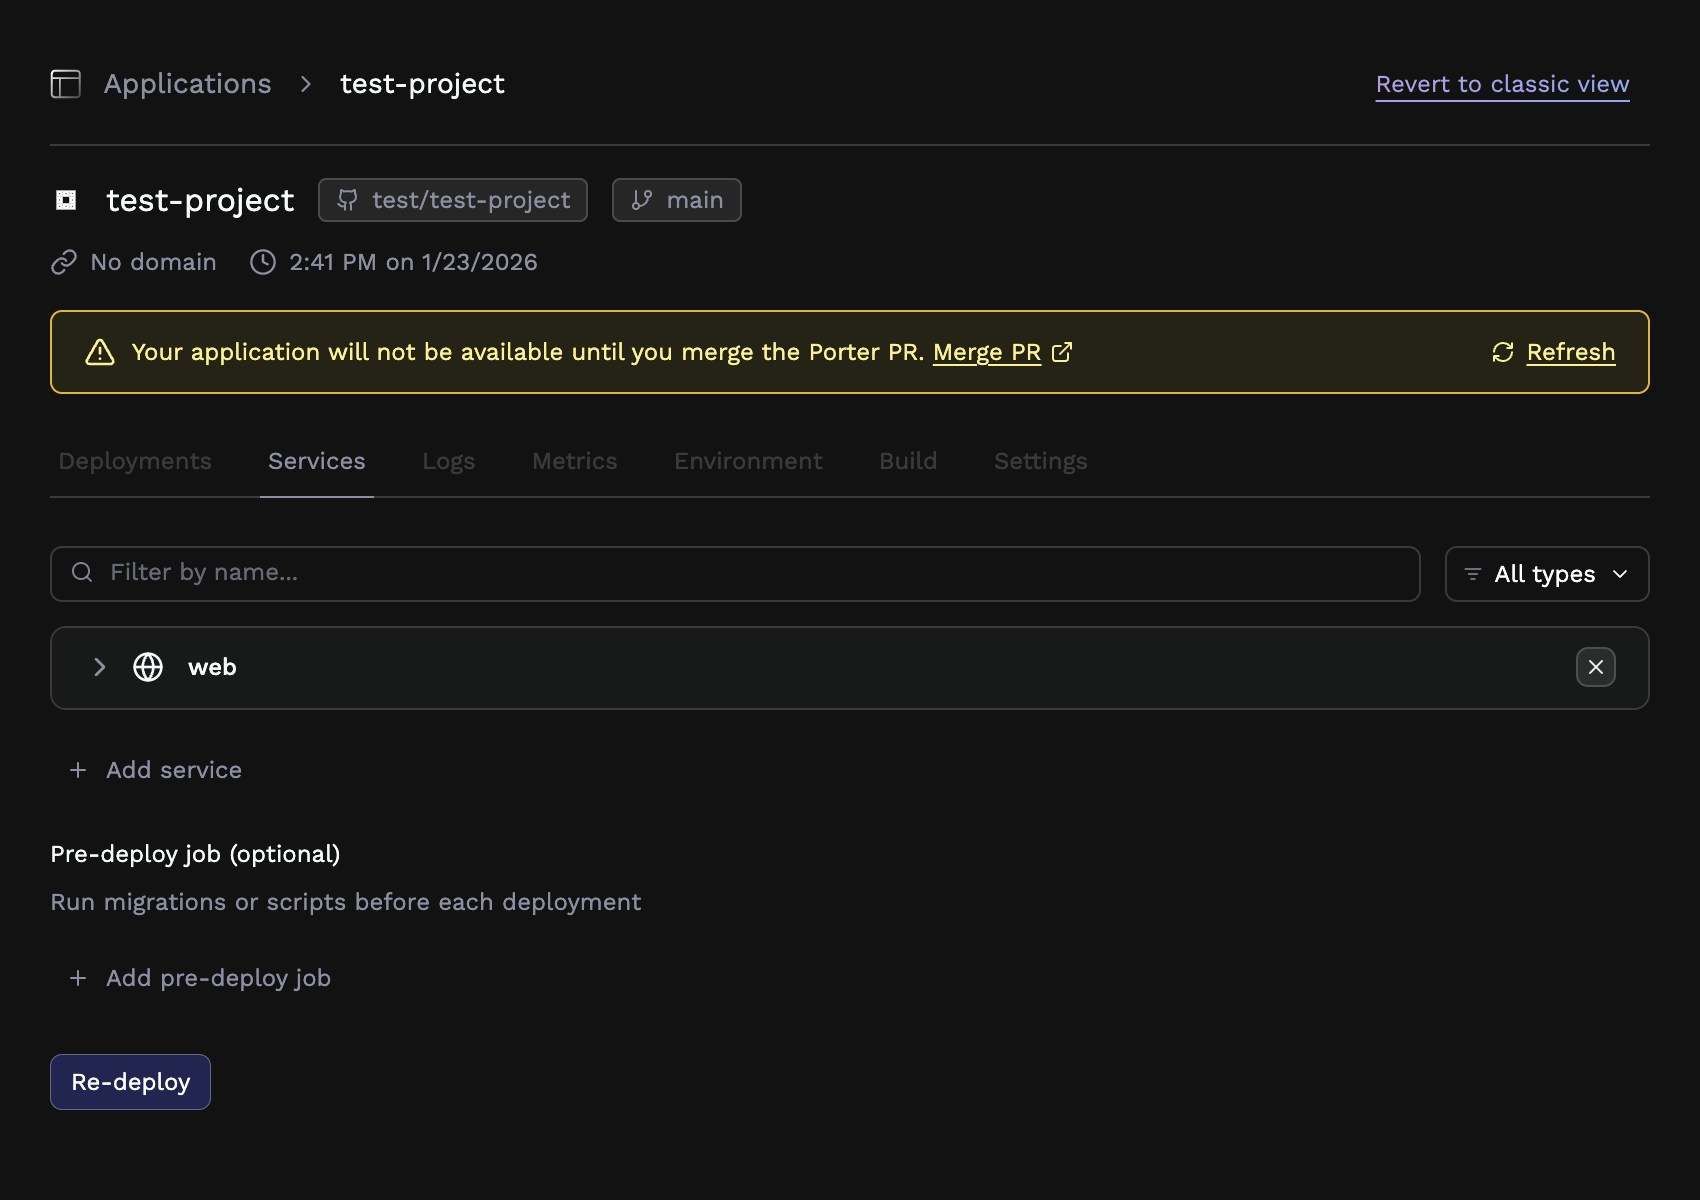
Merge the GitHub Actions PR
Porter creates a pull request in your repository containing a GitHub Actions workflow file at
.github/workflows/porter.yml. This workflow handles building and deploying your application on every push.After clicking Deploy, you’ll see:- A toast notification with a “View PR” button that links directly to the pull request
-
A warning banner on your app’s page with a “Merge PR” link
What's in the workflow file?
What's in the workflow file?
The workflow Porter creates looks like this:


Step 5: View your running application
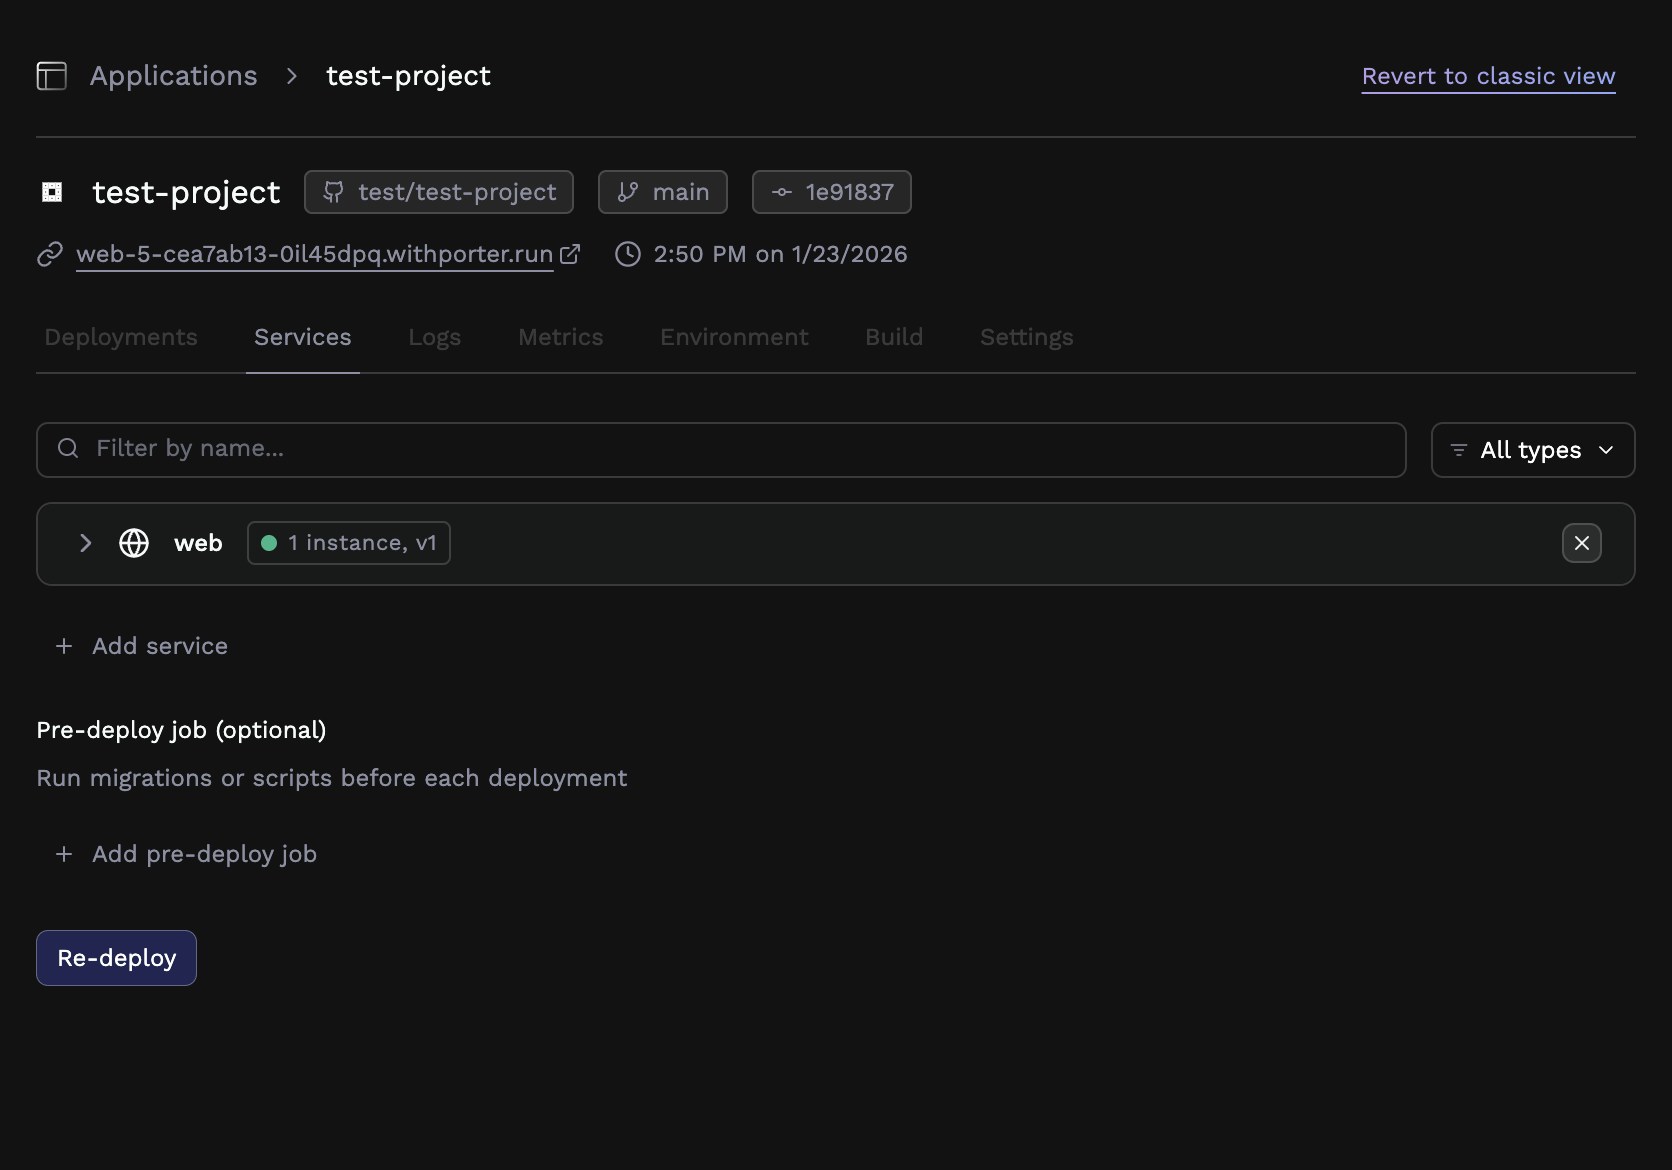
Return to the Porter dashboard to monitor your deployment:- Click on your application to view deployment progress
- Watch the build logs as Porter builds your container image
- Monitor the deployment as Porter starts your application
Access your application
Porter automatically provisions a public URL for your application at*.onporter.run. Click the URL in your dashboard to visit your deployed application.
Congratulations! Your application is now live and will automatically redeploy whenever you push to your selected branch.